
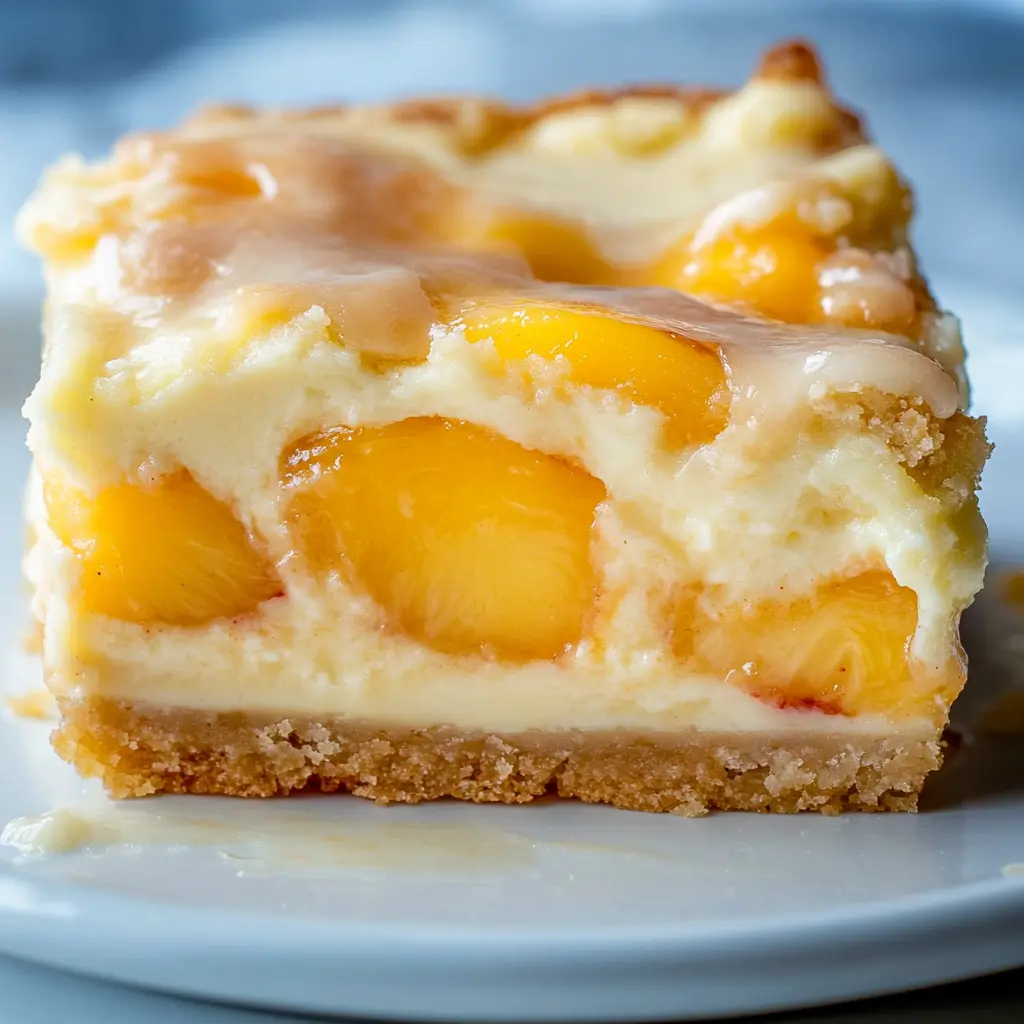
I have a confession: I once ate half a pan of these Peaches and Cream Cheesecake Bars before dinner. Not proud. Not sorry. They are that good.
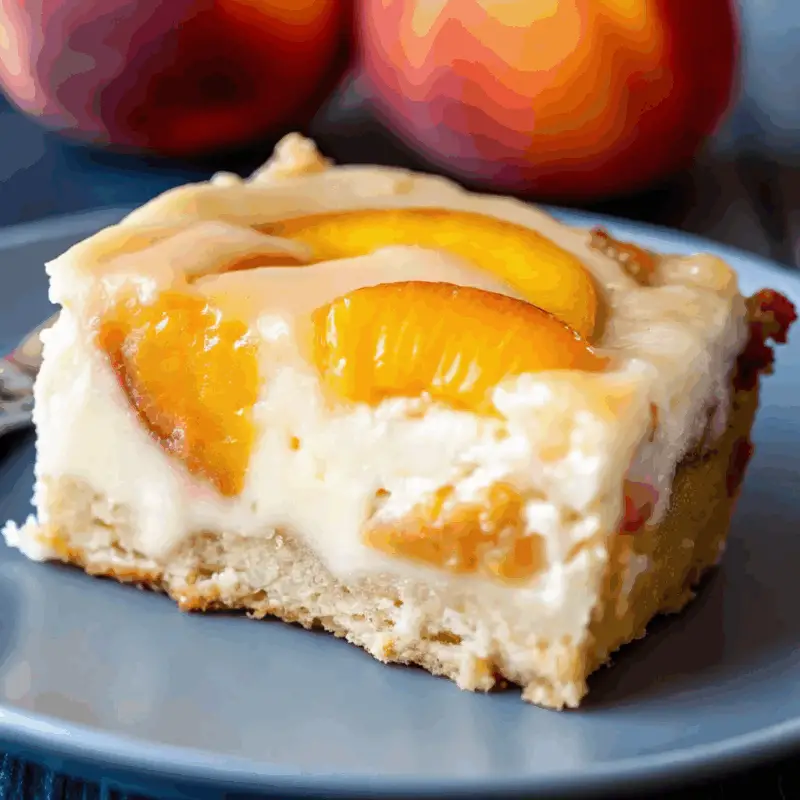
Think sweet summer peaches layered between a soft vanilla crumb base and creamy cheesecake, all topped with a drizzle of almond glaze that’ll have your kitchen smelling like a bakery in Georgia. These bars are easy to make, impressive to serve, and absolutely addictive. And no, you don’t need fresh peaches or complicated steps—just a can of peach pie filling and a mixing bowl.
I first whipped up this recipe on a hot August day when turning on the oven felt like a mistake. But 35 minutes later, I had a tray of peachy perfection and exactly zero regrets. Whether you’re baking for a potluck, a church picnic, or just to treat yourself, this one’s a crowd-pleaser.
Why You’ll Love These Peaches and Cream Cheesecake Bars
- Three glorious layers: Buttery crumb, creamy cheesecake, and fruity peach filling.
- Super simple: No springform pans or water baths—just a trusty 9×13.
- Make-ahead magic: They taste even better after chilling.
- Feeds a crowd: Perfect for parties, barbecues, or “just because” nights.
- Customizable: Swap the fruit filling or tweak the glaze to fit your flavor mood.
Ingredients
For the Crumb Bars:
- 1 cup (2 sticks) unsalted butter, softened
- 2 cups granulated sugar
- 4 large eggs
- 2 tsp vanilla extract
- 3 cups all-purpose flour
- 1 tsp fine salt
- 1 (21 oz) can peach pie filling
For the Cheesecake Layer:
- 8 oz block cream cheese, softened
- ½ cup granulated sugar
- 1 tsp vanilla extract
- 1 large egg
For the Glaze:
- 1 cup powdered sugar
- 2 Tbsp milk
- 1 tsp almond extract
💡 Pro Tip: All ingredients should be at room temperature for the best texture and consistency.
Instructions
1. Preheat & Prepare
- Preheat oven to 350°F (175°C).
- Grease a 9×13-inch pan with butter or spray. Line with parchment for easier lifting if you’re fancy.
2. Make the Crumb Layer
- In a large bowl, beat butter and sugar until pale and fluffy (about 2–3 minutes).
- Add eggs one at a time, mixing well after each. Stir in vanilla.
- In a separate bowl, whisk together flour and salt.
- Gradually add dry ingredients to the wet, mixing just until dough forms. Don’t overdo it.
- Press half the dough into the bottom of the prepared pan—this is your base layer.
3. Cheesecake Layer
- Beat cream cheese and sugar until smooth and creamy.
- Mix in vanilla and egg until just combined.
- Spread over the base crust with an offset spatula or back of a spoon.
4. Peach It Up
- Spoon the peach filling over the cheesecake layer.
- Spread gently, keeping about a ½-inch margin around the edges to avoid overflow.
5. Add the Top Crumb
- Dot spoonfuls of the remaining dough evenly over the peaches. It won’t cover the whole surface—and that’s perfect.
6. Bake
- Bake for 30–35 minutes or until the top is lightly golden and the cheesecake layer is set but slightly jiggly.
- Rotate the pan halfway through baking.
7. Cool & Glaze
- Let cool completely in the pan at room temperature (about 2 hours).
- Mix powdered sugar, milk, and almond extract until smooth.
- Drizzle glaze over the cooled bars.
8. Slice & Serve
- Cut into 9–12 bars depending on your vibe (snack vs. full-blown dessert).
- Wipe the knife between cuts for Instagram-worthy edges.
Melania’s Tips for Peaches and Cream Perfection
- Use full-fat cream cheese (not the spreadable kind in a tub).
- Don’t overmix the cheesecake batter—it can lead to cracks.
- For extra pizzazz, sprinkle slivered almonds over the glaze before it sets.
- Try it chilled! These bars get even better after a night in the fridge.
Bake It With the Littles
These bars are a blast for kids:
- Let them dollop the peach filling and swirl it around.
- They can drizzle the glaze like Jackson Pollock in an apron.
- Teach them about layers—it’s dessert and geometry!
And hey, licking the beaters? Non-negotiable.
Meal-Prep Magic
- Make-ahead: Bake and chill up to 24 hours in advance.
- Storage: Store covered in the fridge for 4–5 days.
- Freeze: Wrap individual bars in parchment and freeze for up to 3 months. Defrost in the fridge overnight.
Healthier Swaps Without Losing the Magic
- Sub Greek yogurt for half the cream cheese to lighten things up.
- Use reduced-sugar peach filling or make your own with fresh peaches and honey.
- Try almond flour in part of the crust for a nutty, gluten-friendly spin.
Just promise me one thing: don’t skip the glaze. It’s the secret sauce.
Leftover Remix
Have a few bars left? (I’m impressed.)
- Crumble over vanilla yogurt for a lazy-girl parfait.
- Chop and fold into ice cream for DIY peach cheesecake ice cream.
- Warm slightly and serve with whipped cream for a quick fancy dessert.
Gift It Like a Pro
These bars make an excellent edible gift:
- Slice, layer between wax paper in a cute bakery box.
- Include a mini card with serving tips and storage instructions.
- Pair with Lemon Crinkle Cookies for a summer sweets sampler.
They’re perfect for birthdays, thank-you gestures, or new neighbor hellos.
FAQs
Can I use homemade peach filling?
Absolutely! Try this homemade peach pie filling recipe if you have fresh peaches.
Can I skip the glaze?
You can, but I wouldn’t. It ties all the flavors together beautifully.
How do I know when it’s done baking?
Look for a golden top and slight jiggle in the cheesecake center—it firms up as it cools.
Can I swap the fruit?
Yes! Try cherry, blueberry, or apple pie filling for easy variations.
Final Thought
There’s something magical about the mix of peaches, cream cheese, and a buttery vanilla crumb. These Peaches and Cream Cheesecake Bars taste like sunshine in dessert form—bright, rich, and oh-so-satisfying. Whether you’re baking for a crowd or sneaking one before breakfast (been there), these bars will bring you joy one sweet slice at a time.
And if you’re craving more fruity bakes, don’t miss our Strawberry Shortcake Skillet—another summer favorite!