
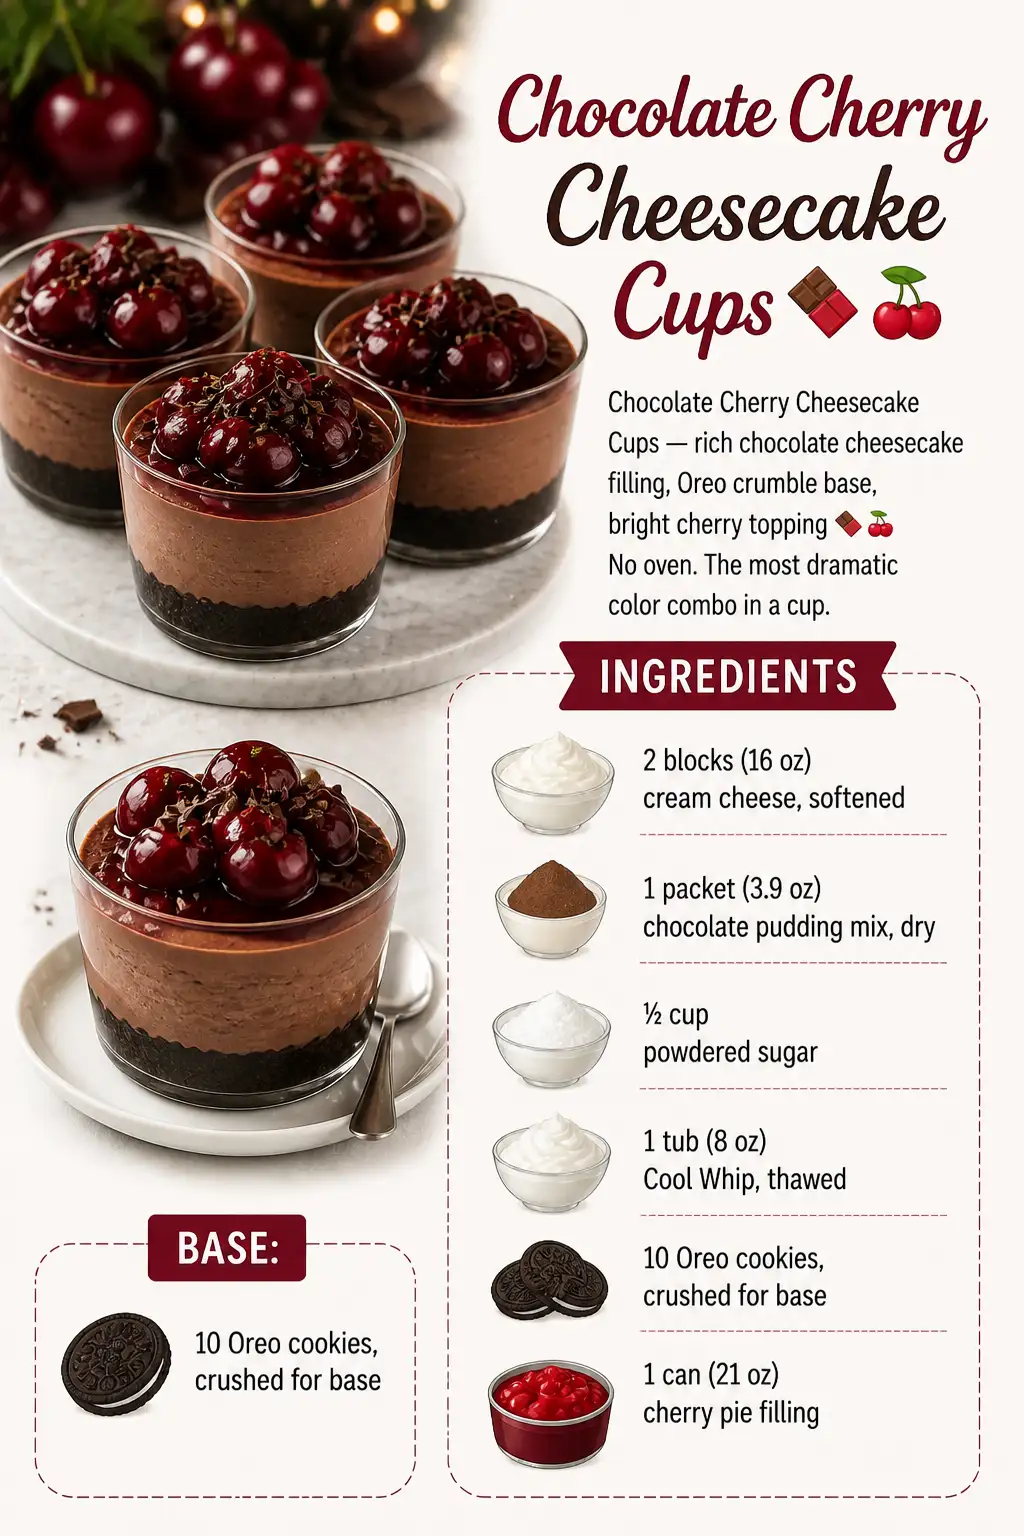
Chocolate Cherry Cheesecake Cups are a delightful treat that combines rich chocolate cheesecake filling, a crunchy Oreo crumble base, and a bright cherry topping. This no-bake dessert is perfect for when you want something impressive without turning on the oven. The dramatic color combination and layers make these cups a visual treat as well as a delicious one. In this post, I’ll guide you through the steps to create this family-friendly dessert that is sure to become a favorite.
Adding cherries to desserts not only enhances the flavor but also provides nutritional benefits. Cherries are rich in antioxidants and vitamins, making them a great choice for a health-conscious treat. For more on the health benefits of cherries, check out this detailed guide on BBC Good Food. If you’re interested in learning about the differences between various types of cherries, this article from Serious Eats offers an excellent overview.
Table of Contents
Why You’ll Love This Dessert
These Chocolate Cherry Cheesecake Cups are a dream come true for anyone who loves the combination of chocolate and cherries. Here’s why you’ll love making and eating them:
- No-bake simplicity: No need to heat up the oven, making it perfect for a quick dessert or a hot day. The ease of preparation means you can whip these up without worrying about preheating or timing things just right as you would with a baked dessert. It’s a great way to involve kids in the kitchen, too, as they can help with layering and assembling the cups.
- Vibrant presentation: The deep red cherries against the chocolate cheesecake and Oreo base create a visually stunning dessert. The contrast of colors makes them perfect for festive occasions or any time you want to impress guests with a dessert that looks as good as it tastes.
- Family-friendly: Kids and adults alike will enjoy the rich flavors and fun layers. This dessert can be a great way to introduce children to the joys of dessert making, as the steps are straightforward and the ingredients are generally liked by all.
- Make-ahead convenience: You can prepare these cups in advance, making them ideal for parties or gatherings. They actually benefit from some time in the refrigerator, allowing the flavors to meld together and the layers to set properly.
The Recipe
For the Cheesecake Filling:
Amount Ingredient Notes 16 oz cream cheese, softened Use full-fat for best texture 3.9 oz chocolate pudding mix, dry Instant pudding mix works best 0.5 cup powdered sugar Adds sweetness and smooth texture 8 oz Cool Whip, thawed Fold gently to keep it airy For the Oreo Base:
Amount Ingredient Notes 10 Oreo cookies, crushed Creates the base layer For the Topping:
Amount Ingredient Notes 21 oz cherry pie filling Brightens the dessert with its color and flavor Instructions:
- Press the crushed Oreos into the bottom of clear cups to form a solid base layer. The Oreo crumbs are buttery and chocolatey, providing the perfect foundation for the creamy layers to come.
- In a mixing bowl, beat together the softened cream cheese, dry chocolate pudding mix, and powdered sugar until the mixture is smooth and dark. This step is crucial for ensuring the cheesecake filling is free of lumps and combines well with the other ingredients.
- Gently fold in the thawed Cool Whip until the mixture becomes light and mousse-like. The Cool Whip adds a fluffy texture, making the cheesecake layer light and airy.
- Spoon the chocolate cheesecake filling over the Oreo base in each cup, smoothing the tops with a spatula. Be sure to distribute the filling evenly among the cups so each serving is equally delicious.
- Top each cup with a generous spoonful of cherry pie filling. The cherry topping provides a sweet and tart contrast to the rich chocolate layer.
- Refrigerate the cups for at least 2 hours to let them set. Serve cold and enjoy the dramatic layers. The time in the refrigerator allows the flavors to meld and the layers to firm up, making each bite a perfect combination of creamy, crunchy, and fruity.
Kitchen Tools You’ll Need
| Tool | Why you need it |
|---|---|
| Electric Mixer | To beat the cream cheese, pudding mix, and sugar |
| Mixing Bowl | For combining the cheesecake filling ingredients |
| Spatula | To fold in the Cool Whip and smooth the filling |
| Clear Cups | For serving and showcasing the beautiful layers |
Having the right tools on hand makes the preparation process much smoother. An electric mixer ensures that the cream cheese and other filling ingredients are thoroughly combined, creating a smooth and creamy texture. A spatula is perfect for gently folding in the Cool Whip without deflating it, maintaining the lightness of the cheesecake filling. Clear cups not only provide a perfect serving size but also allow you to show off the beautiful layers of your creation.
The Benefits of Each Ingredient
| Ingredient | What it does here |
|---|---|
| Cream cheese | Provides a creamy, rich base for the cheesecake |
| Chocolate pudding mix | Adds chocolate flavor and thickens the filling |
| Powdered sugar | Sweetens and smooths the texture |
| Cool Whip | Lightens the filling, making it airy |
| Oreo cookies | Forms the crunchy, chocolatey base |
| Cherry pie filling | Adds color and a sweet-tart finish |
Each ingredient in this recipe plays a vital role in the overall flavor and texture of the dessert. Full-fat cream cheese is essential for achieving a rich, creamy base that holds up well with the other layers. Chocolate pudding mix not only imparts a deep chocolate flavor but also helps to thicken the cheesecake filling. Powdered sugar dissolves easily, ensuring the filling is smooth and sweet. Cool Whip, with its whipped consistency, lightens the texture of the cheesecake, making it almost mousse-like. The crushed Oreo cookies provide a crunchy contrast to the creamy filling, while the cherry pie filling adds a bright, sweet-tart finish that complements the richness of the chocolate.
What to Serve With This Dessert
| Idea | Why it pairs well |
|---|---|
| Fresh whipped cream | Adds extra creaminess and complements cherries |
| Dark chocolate shavings | Enhances the chocolate flavor |
| Vanilla ice cream | Offers a contrast in temperature and texture |
Serving suggestions can elevate your Chocolate Cherry Cheesecake Cups to an even higher level of indulgence. A dollop of fresh whipped cream adds an extra layer of creaminess that pairs beautifully with the cherries. Dark chocolate shavings or curls can be sprinkled on top for an added touch of elegance and a deeper chocolate flavor. For those who enjoy a contrast in temperatures and textures, a scoop of vanilla ice cream on the side can be a delightful addition, creating a hot-and-cold experience that enhances the enjoyment of each bite.
Storage & Leftover Tips
| Method | How long | Tip |
|---|---|---|
| Refrigerate | Up to 3 days | Keep in airtight containers for freshness |
| Freeze | Up to 1 month | Thaw in refrigerator before serving |
Proper storage is key to maintaining the freshness and quality of your cheesecake cups. If you have leftovers, they can be stored in the refrigerator for up to three days. Make sure to keep them in airtight containers to prevent them from absorbing any other flavors or odors in the fridge. If you need to store them for a longer period, freezing is a great option. Simply place them in freezer-safe containers and they’ll keep for up to a month. Before serving, allow them to thaw in the refrigerator to retain their creamy texture.
These Chocolate Cherry Cheesecake Cups are sure to impress your family and guests alike. They’re not only beautiful to look at but also a joy to eat. The combination of creamy, crunchy, and fruity elements makes every bite a delight. Whether you’re hosting a party or just want to treat yourself to something special, these cups are the way to go. Enjoy creating and sharing this irresistible dessert with your loved ones. The ease of preparation and the ability to make them ahead of time make them an excellent choice for any occasion. With such a delightful blend of flavors and textures, these cheesecake cups are destined to become a favorite in your dessert repertoire.
FAQs About Chocolate Cherry Cheesecake Cups
Can I use a different type of cookie for the base?
Yes, you can use graham crackers, vanilla wafers, or any other cookie you prefer. Just crush them to create a similar crumbly texture.
How long will these cheesecake cups last in the fridge?
These cheesecake cups can be stored in the refrigerator for up to 3 days. Make sure they are covered or stored in an airtight container to maintain freshness.
Can I make this dessert ahead of time?
Absolutely! You can make these cups a day in advance. Just keep them covered in the refrigerator until you’re ready to serve. This makes them perfect for entertaining or busy schedules.
Chocolate Cherry Cheesecake Cups
Ingredients
Equipment
Method
- Press crushed Oreos into the bottom of clear cups.
- Beat cream cheese, chocolate pudding mix, and powdered sugar until smooth and dark.
- Fold in Cool Whip gently until mousse-like.
- Spoon chocolate cheesecake filling over the Oreo base.
- Spoon cherry pie filling on top. Refrigerate 2 hours. Serve cold.