Hey there, friends! I’m Mateo, your friendly home cook, and today I’m excited to share a recipe that brings warmth and comfort right to your dinner table. If you’ve never cooked with taro root before, you’re in for a treat. Taro is a staple in many cuisines around the world, and it’s one of those underappreciated roots that deserves a spot in your kitchen. Today, we’re going to make Air Fryer Taro Root — a dish that’s not only easy to prepare but also filled with flavors that your family will love.
Why You’ll Love This Recipe
Imagine coming home after a long day and needing something that’s both nourishing and quick to prepare. This Air Fryer Taro Root recipe checks all the boxes. Let’s dive into why this dish is going to become a regular in your meal rotation:
-
Simple and Quick: With only 15 minutes of prep time and 25 minutes of cooking, you can whip up a delicious side dish in no time. The speed of preparation makes it perfect for weeknight dinners when time is of the essence. You can even prepare the taro root in advance by peeling and cutting it the night before, storing it in water in the fridge to prevent oxidation.
-
Family-Friendly: This recipe is perfect for family dinners. It’s a delightful way to introduce your loved ones to new flavors and textures. Even picky eaters often find the crispy exterior and soft interior of taro irresistible. You might find your children enjoying it as much as their favorite fries, and it’s a great way to encourage them to try new foods.
-
Healthy and Delicious: Cooking taro root in the air fryer uses minimal oil, making it a healthier option compared to deep frying. The air fryer ensures that you get the desired crispiness with very little added fat. Taro is also naturally gluten-free, adding to its appeal for those with dietary restrictions.
-
Versatile: The subtle flavors of taro can be paired with just about any main dish, making it an adaptable addition to your meal plan. Whether you’re serving a hearty stew or a light salad, taro fits right in. Consider adding different herbs and spices to match the flavor profile of your main dish.
-
Comfort Food at Its Best: The crispy exterior and tender interior make this dish the ultimate comfort food. It’s like the best of both worlds — crunchy and soft, satisfying all your texture cravings in one bite. On a cold day, there’s nothing quite like a warm serving of taro to lift your spirits.
The Recipe
Here’s how you can make this delightful Air Fryer Taro Root at home. This recipe is straightforward and doesn’t require any special culinary skills, just a willingness to try something new and delicious.
Prep time: 15 minutes | Cook time: 25 minutes | Temperature: 375°F | Servings: 2
Ingredients
- 1 lb taro root
- 1 tablespoon olive oil
- 1 teaspoon salt
- 1 teaspoon garlic powder (optional)
- 1/2 teaspoon black pepper (optional)
Instructions
-
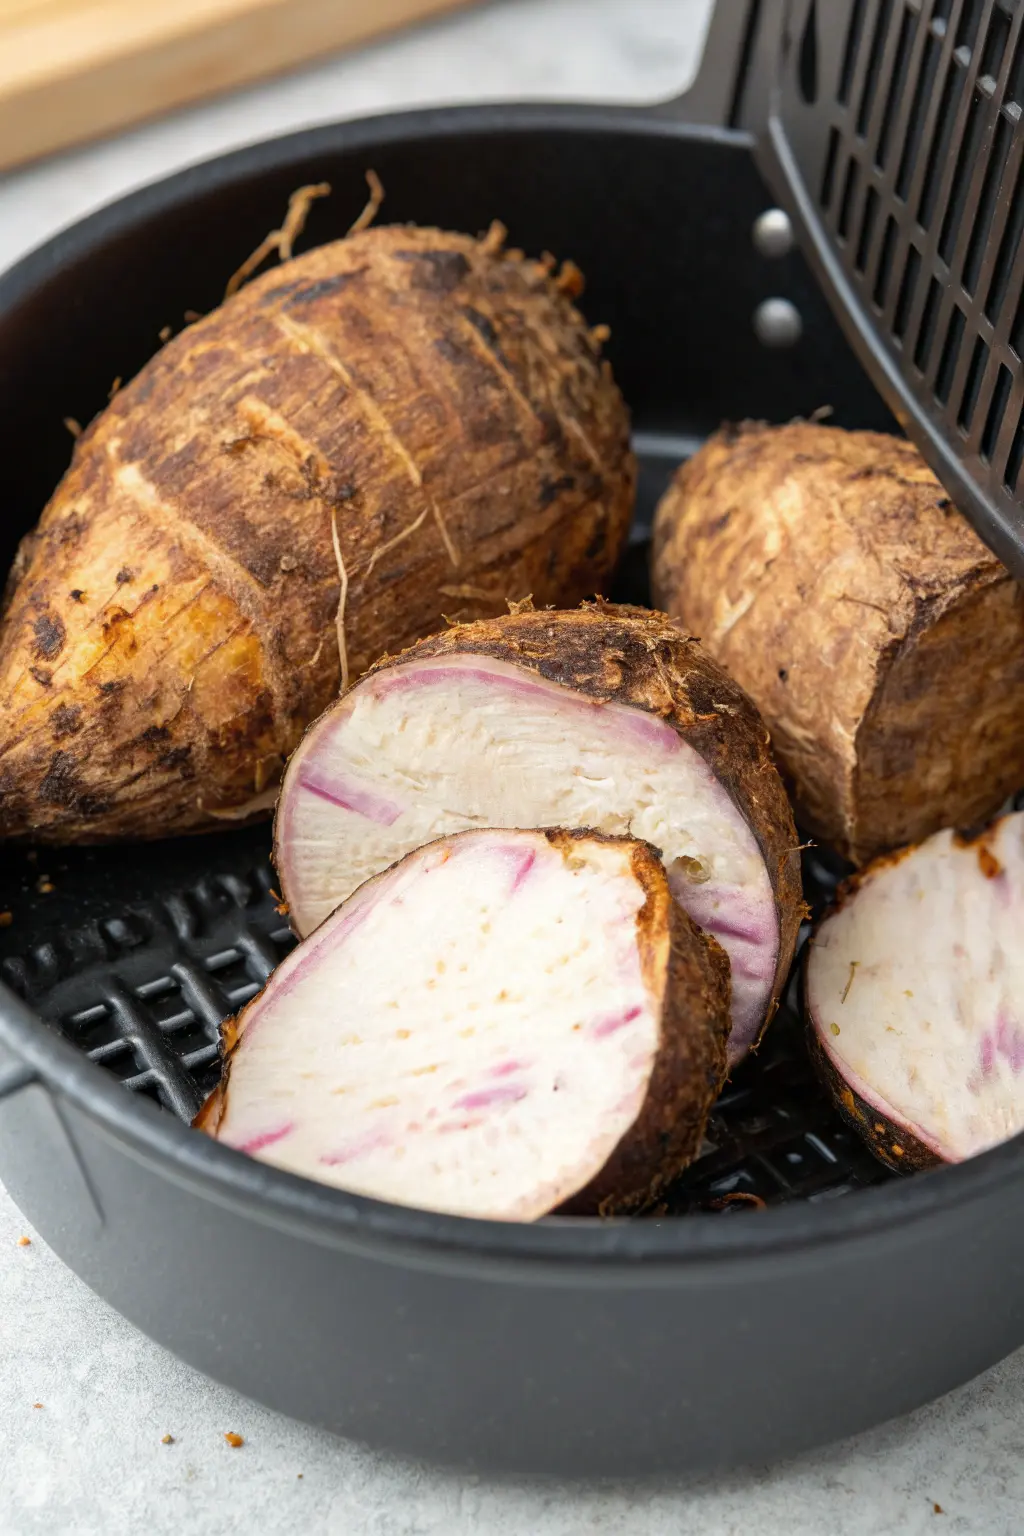
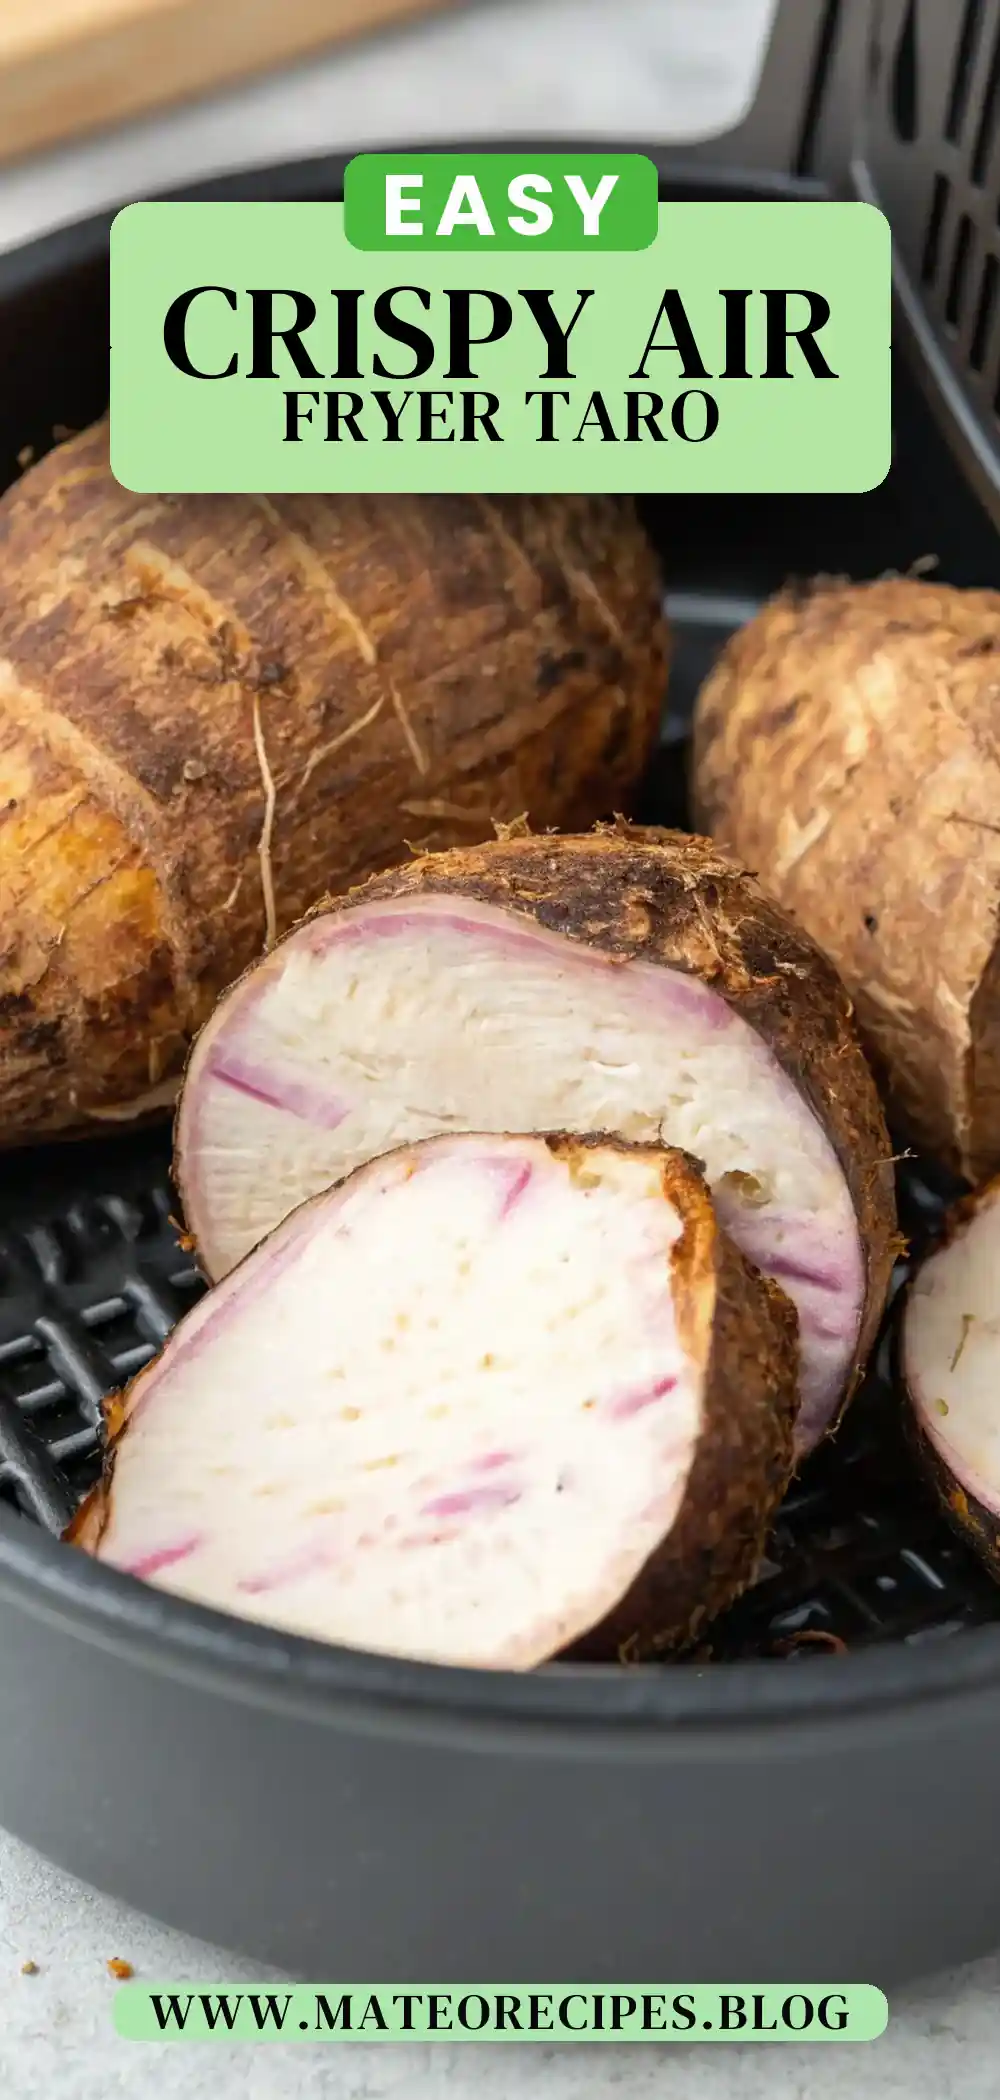
Prepare the Taro Root: Start by peeling the taro root and cutting it into 1-inch cubes. It’s essential to get similar-sized pieces for even cooking. When peeling taro, use a sharp knife or vegetable peeler, and be mindful of its slippery texture. Taro can sometimes cause skin irritation, so consider wearing gloves if you have sensitive skin.
-
Seasoning: In a mixing bowl, toss the taro cubes with olive oil, salt, garlic powder, and black pepper until evenly coated. This step ensures each piece is packed with flavor. Feel free to adjust the seasoning to your taste preferences, adding spices like paprika or cayenne for a bit of heat. You can also experiment with different herb blends like Italian seasoning or za’atar for a unique twist.
-
Preheat the Air Fryer: Set your air fryer to 375°F and let it preheat for 5 minutes. Preheating is crucial for achieving that perfect crispy texture. It helps start the cooking process immediately, enhancing the crunch factor of the taro. Some models have a preheat function, making this step even easier.
-
Cooking: Place the seasoned taro cubes in the air fryer basket in a single layer. If you’re cooking a larger batch, feel free to work in batches. Overcrowding the basket will result in uneven cooking and less crispiness. You can also experiment with using air fryer liners or parchment paper to make cleanup easier.
-
Cook and Shake: Let the taro cook for 15 minutes, shaking the basket halfway through to ensure they cook evenly. Shaking also prevents the pieces from sticking together. If you notice any pieces browning faster than others, you can rearrange them for more even cooking.
-
Check and Continue: After 15 minutes, check for doneness. The taro should be tender and lightly golden. If it’s not quite there, cook for an additional 5-10 minutes. The exact time can vary depending on your air fryer model and the size of the taro pieces. Keep an eye on them towards the end to prevent overcooking.
-
Serve: Remove from the air fryer and serve hot. Remember, let them cool for a few minutes as they retain heat. A sprinkle of fresh herbs like parsley or cilantro can add a fresh pop of color and flavor. If you’re feeling indulgent, a light dusting of grated Parmesan can add an extra layer of deliciousness.
Helpful Tip: Allow the taro root to cool for a few minutes before serving, as it can retain heat and be quite hot inside. This cooling time also allows the flavors to meld beautifully, enhancing each bite.
Kitchen Tools You’ll Need
To make this recipe a success, having the right tools at your disposal is key. Here’s what you’ll need:
-
Air Fryer: The key tool for this recipe. It gives the taro root a lovely crisp texture without deep frying. If you’re in the market for an air fryer, consider one with adjustable temperature settings and a spacious basket. A model with a digital display can provide more precise control over cooking times and temperatures.
-
Sharp Knife: For peeling and cutting the taro into uniform cubes. A well-maintained knife ensures precision and safety. A chef’s knife or a santoku knife are both excellent choices for this task.
-
Mixing Bowl: To mix the taro with the seasoning. A bowl with high sides helps contain all the ingredients as you toss them. Stainless steel or glass bowls are ideal as they are easy to clean and don’t absorb flavors.
-
Cooking Tongs: Useful for removing the hot taro from the air fryer safely. They provide a firm grip, preventing any accidental slips. Silicone-tipped tongs are gentle on non-stick surfaces like air fryer baskets.
The Benefits of Each Ingredient

Understanding the role of each ingredient can enhance your appreciation for this dish:
-
Taro Root: High in fiber and nutrients, taro is a great alternative to potatoes and adds a unique flavor. It’s rich in vitamins A, C, E, and B6, as well as potassium and manganese. Taro is also known for its prebiotic properties, promoting a healthy gut. Its complex carbohydrates provide a stable source of energy, making it a fantastic choice for sustained energy levels throughout the day.
-
Olive Oil: A healthy fat that helps in crisping the taro while adding a subtle richness. Olive oil is packed with antioxidants and anti-inflammatory compounds, contributing to heart health and overall well-being. Its mild flavor complements the earthiness of taro without overpowering it.
-
Salt: Enhances the natural flavors of taro, making it more palatable. Salt is crucial for balancing flavors and bringing the dish together. Using sea salt or kosher salt can add a different texture and slightly varied taste compared to standard table salt.
-
Garlic Powder & Black Pepper: Optional, but they add depth and a slight kick to the dish. Garlic powder offers a savory aroma, while black pepper adds a gentle heat that complements the earthy taro. These spices are staples in many kitchens due to their versatility and ability to elevate the flavors of various dishes.
What to Serve With This Dish
Air Fryer Taro Root is incredibly versatile. It pairs well with a variety of dishes, making it a great side for any meal. Here are some serving suggestions:
-
Pair it with grilled meats like my Grilled Lemon Chicken for a balanced meal. The citrus notes from the chicken enhance the mild flavor of the taro, creating a harmonious combination that’s both refreshing and satisfying.
-
For a comforting dinner, serve it alongside my Creamy Tomato Soup, which complements the crispy and tender taro perfectly. The creaminess of the soup contrasts beautifully with the crispy taro, making for a cozy meal that’s perfect for chilly evenings.
-
Add a dipping sauce such as a garlicky aioli or spicy sriracha mayo for an extra flavor boost. These sauces can be easily prepared at home and tailored to your taste preferences, providing a customizable element to your meal.
Storage & Leftover Tips
If you have leftovers (though I doubt you will!), proper storage and reheating methods can ensure they remain delicious:
-
Storage: Store in an airtight container in the fridge for up to 3 days. This helps maintain their freshness and prevents them from absorbing other flavors from the fridge. To keep them even fresher, line the container with a paper towel to absorb any excess moisture.
-
Reheating: To reheat, pop them back in the air fryer for a few minutes to regain their crispiness. This method restores their original texture better than a microwave. If you don’t have access to an air fryer, you can also reheat them in a conventional oven at 375°F for about 10 minutes.
-
Avoid Microwaving: Microwaving can make them soggy, losing the delightful crispiness that makes them so special. If you must use a microwave, consider using a microwave crisper tray to help retain some of the texture.
I hope you enjoy making and eating this Air Fryer Taro Root as much as I do. It’s a dish that brings comfort and joy with every bite, and it’s perfect for bringing the family together around the dinner table. Happy cooking, and remember, the best meals are the ones shared with loved ones. Until next time, stay happy and keep cooking!
Air Fryer Taro Root
Ingredients
Equipment
Method
- Peel the taro root and cut it into 1-inch cubes.
- In a mixing bowl, toss the taro cubes with olive oil, salt, garlic powder, and black pepper until evenly coated.
- Preheat the air fryer to 375°F for 5 minutes.
- Place the seasoned taro cubes in the air fryer basket in a single layer (work in batches if necessary).
- Cook for 15 minutes, shaking the basket halfway through for even cooking.
- Check for doneness; the taro should be tender and lightly golden. If needed, cook for an additional 5-10 minutes.
- Remove from the air fryer and serve hot.