
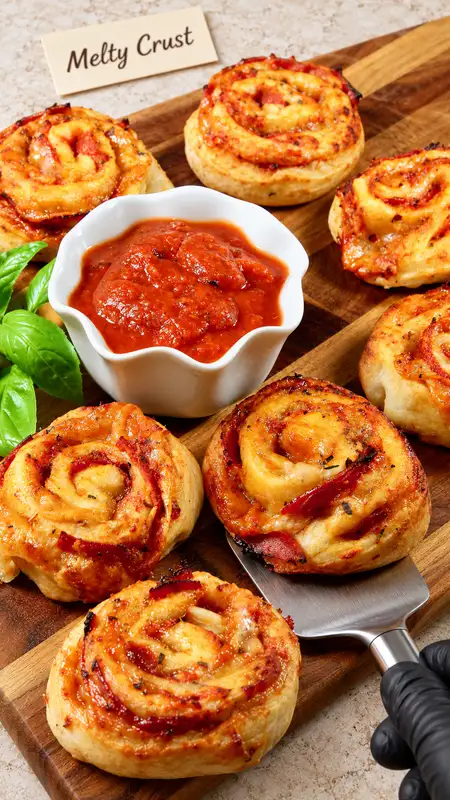
CHEESY PEPPERONI PIZZA ROLLS are one of my favorite go-to snacks for a family movie night or a casual gathering with friends. There’s something magical about the combination of gooey cheese, spicy pepperoni, and soft pizza dough rolled into perfect bite-sized pieces. These rolls are a delightful twist on the traditional pizza, offering all the flavors we love with an added element of fun. Plus, they are incredibly easy to make, which means less time in the kitchen and more time enjoying with your loved ones.
If you’re a fan of homemade pizza, you’ll appreciate the simplicity of using store-bought dough for this recipe. It’s a great way to save time while still enjoying the satisfaction of a home-cooked meal. For those who love making everything from scratch, consider trying a homemade pizza dough recipe for an extra touch of authenticity. Additionally, learning how to properly store pepperoni can help you keep your ingredients fresh, ensuring the best possible flavor for your pizza rolls.
Imagine the scene: the aroma of freshly baked pizza wafting through your home, laughter echoing in the background, and the anticipation of a delicious snack that everyone will enjoy. Cheesy Pepperoni Pizza Rolls are more than just food; they’re a moment of connection, a way to bring people together. Whether you’re hosting a casual get-together or simply enjoying a quiet evening with family, these pizza rolls fit perfectly into any occasion.
Table of Contents
Why You’ll Love This Dish
Cheesy Pepperoni Pizza Rolls are a fantastic appetizer or snack that brings the family together with their inviting aroma and delicious taste. Here’s why you’ll fall in love with this recipe:
- Quick and Easy: With just 20 minutes of prep time and 12 minutes of baking, these pizza rolls come together in no time. The simplicity of this recipe means that even on the busiest of days, you can whip up something delightful without stress. Busy parents will appreciate the straightforward process, and even novice cooks can achieve great results.
- Kid-Friendly: Kids love helping out in the kitchen, and this recipe is perfect for little hands to assist with rolling and sprinkling cheese. Involving children in cooking not only makes the process more enjoyable but also teaches them valuable skills. Plus, when kids help make their own food, they’re more likely to eat it, which is a win-win for everyone.
- Customizable: While pepperoni is a classic choice, feel free to add your favorite toppings like mushrooms, olives, or bell peppers. This flexibility allows each person to create their own perfect pizza roll, catering to diverse tastes and dietary preferences. Vegetarians, for instance, can omit the pepperoni and go heavy on veggies, while spice lovers might add extra red-pepper flakes for a kick.
- Perfect for Parties: These rolls are a crowd-pleaser at any event, from birthday parties to game days. They are easy to eat with your hands, minimizing the need for utensils and making them ideal for social gatherings. Plus, their compact size means they fit nicely on a buffet table or a platter passed around the room.
- Make-Ahead Friendly: You can prepare these rolls in advance and bake them just before serving. This is a lifesaver when you’re hosting an event, allowing you to spend more time with your guests and less time in the kitchen. Simply prepare the rolls, refrigerate them, and bake when you’re ready to serve.
The Recipe
For the Pizza Rolls:
| Amount | Ingredient | Notes |
|---|---|---|
| 390 g | refrigerated pizza crust | — |
| 240 ml | marinara | divided |
| 50 g | shredded mozzarella | — |
| 25 g | grated Parmesan | — |
| 50 g | pepperoni halves | — |
| 2 tbsp | minced onion | optional |
| 0.5 tsp | Italian seasoning | — |
| 0.5 tsp | garlic powder | — |
| 0.25 tsp | red-pepper flakes | optional |
- Start by flattening the refrigerated pizza dough on a floured surface. Spread about half of the marinara sauce thinly over the dough, ensuring to leave a ½-inch border around the edges. This step is crucial for achieving that perfect roll without any sauce spilling out.
- Sprinkle the shredded mozzarella and grated Parmesan evenly over the sauce. Add the pepperoni halves, minced onion (if using), and season with Italian seasoning, garlic powder, and red-pepper flakes. The layering of these ingredients ensures that every bite is packed with flavor.
- Roll the dough tightly, starting from one edge, and seal the seam. Place the roll in the refrigerator to chill for about 10 minutes. Chilling helps the dough firm up, making it easier to slice without squishing the rolls.
- Preheat your oven to 425°F (220°C) and line a baking tray with parchment paper. Slice the chilled roll into 12 even pieces. Precision in slicing ensures that each piece bakes evenly, resulting in uniformly golden and crisp pizza rolls.
- Arrange the rolls on the prepared baking tray and bake for 10–12 minutes, or until they turn golden brown and the cheese is melted to perfection. The sight of bubbling cheese and crispy edges signals that they’re ready to enjoy.
- Serve warm with the remaining marinara sauce for dipping. The marinara sauce not only complements the flavors but also adds a delightful contrast in texture.
Kitchen Tools You’ll Need
| Tool | Why you need it |
|---|---|
| Baking Tray | For baking the pizza rolls |
| Parchment Paper | To prevent sticking and ensure easy clean-up |
| Sharp Knife | For slicing the rolled dough |
| Rolling Pin | To flatten the pizza dough evenly |
| Mixing Bowl | For mixing toppings, if needed |
The right tools can make a world of difference in the kitchen. A sharp knife ensures clean cuts, a baking tray provides even heat distribution, and parchment paper makes clean-up a breeze. Each tool plays a role in making your cooking experience smooth and enjoyable.
The Benefits of Each Ingredient
| Ingredient | What it does here |
|---|---|
| Refrigerated Pizza Crust | Provides a convenient and quick base |
| Marinara | Adds tangy flavor and moisture |
| Shredded Mozzarella | Melts beautifully for that cheesy pull |
| Grated Parmesan | Enhances the flavor with a salty kick |
| Pepperoni Halves | Offers spicy and savory notes |
| Minced Onion | Adds an optional layer of flavor |
| Italian Seasoning | Brings out traditional pizza flavors |
| Garlic Powder | Adds depth and warmth |
| Red-Pepper Flakes | Provides optional heat |
Understanding the role each ingredient plays not only enhances your cooking skills but also allows you to experiment confidently. Each component contributes to the overall flavor profile, ensuring a harmonious blend of tastes and textures.
What to Serve With This Dish
| Idea | Why it pairs well |
|---|---|
| Fresh Green Salad | Balances the richness with freshness |
| Garlic Bread | Complements with extra garlic flavor |
| Sparkling Lemonade | Refreshes the palate between bites |
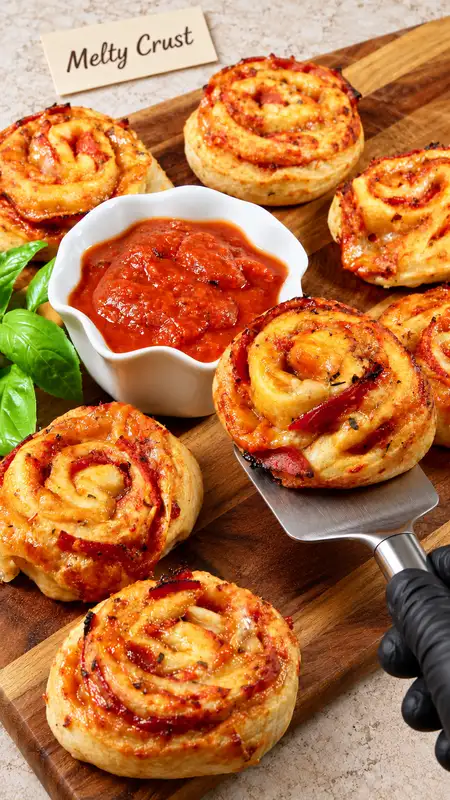
Pairing your Cheesy Pepperoni Pizza Rolls with the right sides can elevate the meal. A fresh green salad adds a vibrant contrast, garlic bread doubles down on beloved flavors, and sparkling lemonade offers a refreshing counterpoint to the richness of the rolls.
Storage & Leftover Tips
| Method | How long | Tip |
|---|---|---|
| Refrigerator | 3–4 days | Store in an airtight container |
| Freezer | 1 month | Wrap tightly in foil or plastic wrap |
| Reheating | Until warm | Use an oven to retain crispiness |
Proper storage extends the enjoyment of your pizza rolls beyond the initial serving. Keeping them in an airtight container in the fridge ensures freshness, while freezing them allows for future indulgence. When reheating, using an oven helps maintain the original texture, ensuring the rolls are just as delightful the second time around.
As you embark on this cheesy, delicious journey of making Cheesy Pepperoni Pizza Rolls, remember that cooking is not just about the final product, but also the joy of creating something delightful for those you care about. These rolls are sure to become a favorite in your household, just as they are in mine. Enjoy every bite, and don’t be afraid to experiment with your favorite toppings.
There’s a special kind of satisfaction in watching your loved ones savor something you’ve made from scratch. Cheesy Pepperoni Pizza Rolls are not just about filling the stomach; they’re about warming the heart. So gather your ingredients, enlist some helpers, and dive into the delightful world of homemade pizza rolls. Who knows? You might just start a new family tradition. Enjoy!
FAQs About CHEESY PEPPERONI PIZZA ROLLS
Can I use a different type of cheese?
Yes, feel free to substitute mozzarella with cheddar or a cheese blend for a different flavor profile.
How can I make these rolls in advance?
You can prepare the rolls up to the point of baking, then cover and store them in the refrigerator for up to a day before baking.
Are there any vegetarian alternatives to pepperoni?
Absolutely! Try using mushrooms, bell peppers, or olives for a vegetarian version of these pizza rolls.
Cheesy Pepperoni Pizza Rolls
Ingredients
Equipment
Method
- Flatten dough on a floured surface. Spread some marinara thinly, leaving ½-inch edges. Add cheeses, pepperoni, onion, and seasonings.
- Roll tightly; seal. Refrigerate 10 minutes.
- Heat oven to 425°F/220°C. Line tray with parchment. Slice into 12 rolls.
- Bake 10–12 minutes until golden and melted. Serve with remaining warmed marinara.