My grandmother kept a worn recipe card tucked in her favorite cookbook, stained with butter and sweetened condensed milk. On it, she’d written “Magic Bars – everyone’s favorite!” in her neat cursive. I discovered why they earned that name the first time I made them myself. With just seven simple ingredients layered in a pan, these bars transform into something truly magical in the oven—gooey, crunchy, sweet, and absolutely irresistible.
Also known as Magic Bars or Hello Dolly Bars, these vintage treats have been gracing potlucks and bake sales since the 1960s. What makes them so special is their incredible simplicity. There’s no complicated mixing, no chilling required, and no special techniques. You literally layer ingredients in a pan, pour sweetened condensed milk over everything, and let the oven work its magic.
Why You’ll Love This Recipe
- Only 7 ingredients needed
- No mixer required, just layer and bake
- Ready in under 40 minutes
- Perfect for potlucks and bake sales
- Crowd-pleasing combination of flavors and textures
- Easy cleanup with just one pan
Ingredients You’ll Need
- 1 1/2 cups graham cracker crumbs – About 10-12 full graham crackers crushed
- 1/2 cup salted butter, melted – Use real butter for best flavor
- 1 cup sweetened shredded coconut – Sweetened works better than unsweetened
- 1 cup semi-sweet chocolate chips – You can also use milk chocolate
- 1 cup butterscotch chips – Adds caramel-like sweetness
- 1 cup pecans, roughly chopped – Can substitute with walnuts
- 14 ounces sweetened condensed milk – One standard can
Important: Don’t confuse sweetened condensed milk with evaporated milk—they’re completely different. Sweetened condensed milk is thick, sweet, and essential for binding these bars together.
Step-by-Step Instructions
- Prepare the pan: Preheat oven to 350°F (175°C). Spray a 9×13 inch baking pan with baking spray or line with parchment paper, leaving overhang on the sides for easy removal.
- Make the crust: In a medium bowl, combine graham cracker crumbs and melted butter. Mix until all crumbs are moistened and the mixture resembles wet sand.
- Press the crust: Press the graham cracker mixture firmly and evenly into the bottom of the prepared pan. Use the bottom of a measuring cup to pack it down well.
- Add the coconut: Evenly sprinkle the sweetened shredded coconut over the crust layer.
- Layer the chips: Distribute the chocolate chips evenly over the coconut, followed by the butterscotch chips.
- Add the nuts: Sprinkle the chopped pecans evenly over the chip layers.
- Pour the milk: Slowly drizzle the sweetened condensed milk over the entire pan. Try to cover as much of the surface as possible, working in a zigzag pattern.
- Bake: Bake for 25-28 minutes until the edges are light golden brown and the center is set but still slightly gooey.
- Cool completely: Let the bars cool completely in the pan before cutting. This is crucial—cutting while warm will create a mess.
Tips for Success
Pack that crust firmly: A well-compressed crust holds together much better. Press down hard with the bottom of a measuring cup or glass.
Distribute layers evenly: Make sure each layer covers the entire surface. This ensures every bite has all the flavors.
Don’t rush the condensed milk: Pour it slowly and methodically. If you dump it all in one spot, it won’t distribute properly.
Cool completely before cutting: I know it’s tempting, but wait at least 2 hours. These bars need time to set, and cutting too early makes them fall apart.
Use parchment paper: Lining the pan with parchment paper with overhang makes removing and cutting much easier.
Check at 25 minutes: Every oven is different. Start checking at 25 minutes to avoid overbaking, which can make the bars dry.
Variations
- Double chocolate: Replace butterscotch chips with more chocolate chips or white chocolate chips
- Tropical version: Add 1/2 cup dried pineapple or mango chunks with the coconut
- Peanut butter twist: Use peanut butter chips instead of butterscotch
- Extra nutty: Mix different nuts like almonds, cashews, and walnuts
- Toffee bars: Add 1/2 cup toffee bits to the layers
- Dark chocolate: Use dark chocolate chips for a less sweet version
Storage
Room temperature: Store in an airtight container for up to 5 days. Place parchment paper between layers to prevent sticking.
Refrigerator: Keep refrigerated for up to 2 weeks. They actually taste great cold and the texture becomes more fudgy.
Freezer: Wrap individual bars in plastic wrap and freeze for up to 3 months. Thaw at room temperature for 30 minutes before serving.
Frequently Asked Questions
Why are my bars falling apart when I cut them?
You didn’t let them cool completely. These bars need at least 2 hours to set properly. Refrigerating for 30 minutes before cutting also helps.
Can I use unsweetened coconut?
You can, but the bars will be less sweet. If using unsweetened coconut, consider adding an extra tablespoon of sugar to the crust.
My bars are too dry. What happened?
You likely overbaked them. They should look slightly underdone in the center when you remove them. They’ll continue to set as they cool.
Can I make these without nuts?
Absolutely! Replace the pecans with an extra cup of chocolate chips, more coconut, or leave them out entirely.
What if I don’t have graham crackers?
Use vanilla wafer cookies, digestive biscuits, or even crushed pretzels for a sweet-salty twist.
Can I double this recipe?
Yes, but use two 9×13 pans rather than one larger pan. The bars need to be a certain thickness to bake properly.
Why is the bottom soggy?
The crust wasn’t packed firmly enough, or you used too much butter. Make sure to compress the crust layer really well.
Final Thoughts
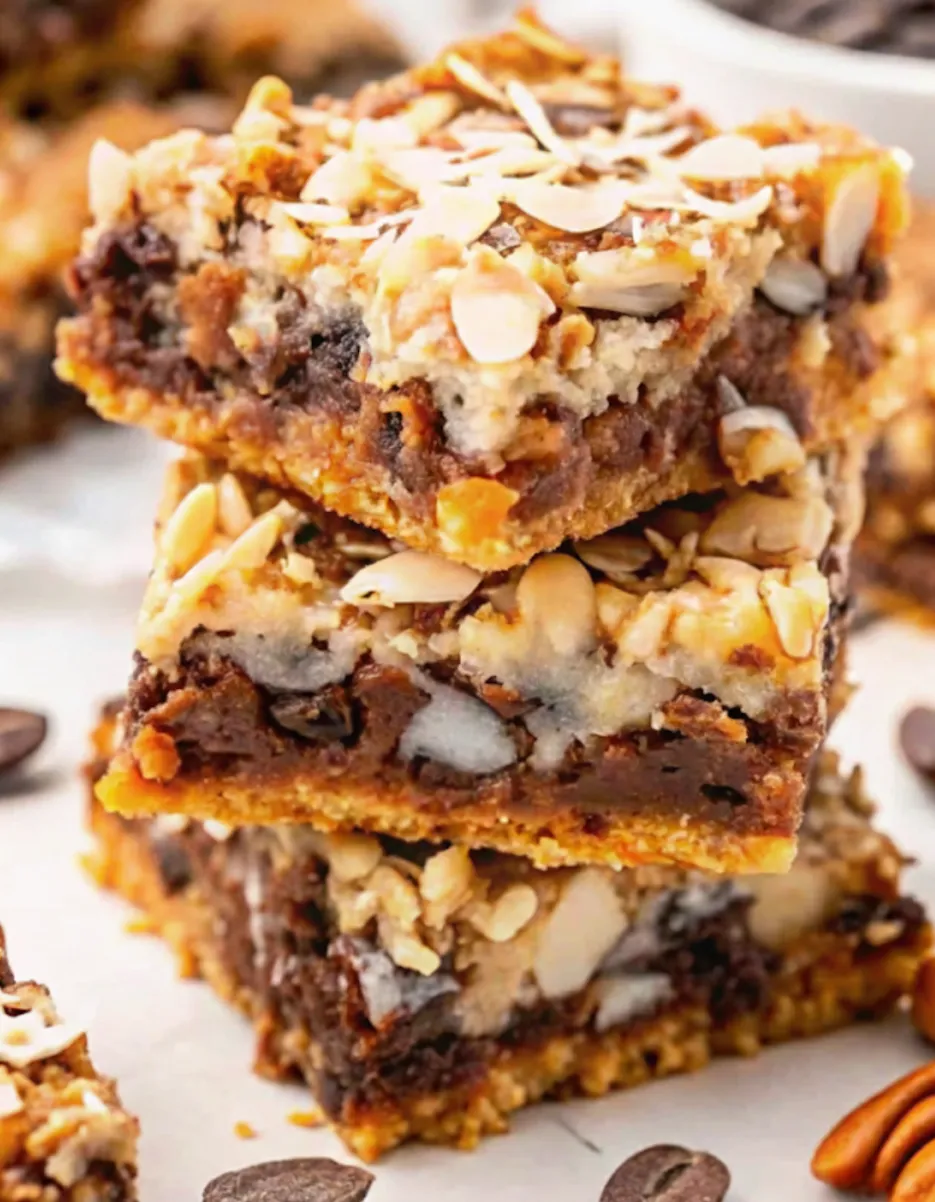
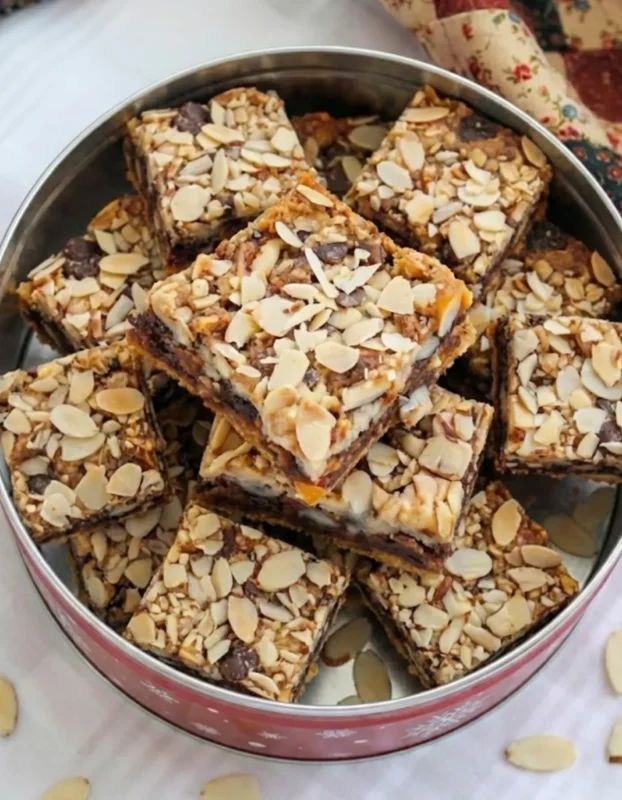
These Vintage 7 Layer Bars are the definition of comfort food nostalgia. Every bite delivers multiple textures and flavors—crunchy graham cracker base, chewy coconut, melty chocolate, buttery pecans, all held together by sweet condensed milk. They’re the kind of dessert that disappears quickly at gatherings, with everyone asking for the recipe.
What I love most about these bars is their versatility. You can customize the layers to suit any preference while keeping the same foolproof method. Whether you’re an experienced baker or making your first dessert, these bars will turn out beautifully. Make them once, and they’ll become your go-to recipe for every potluck, bake sale, and family gathering.