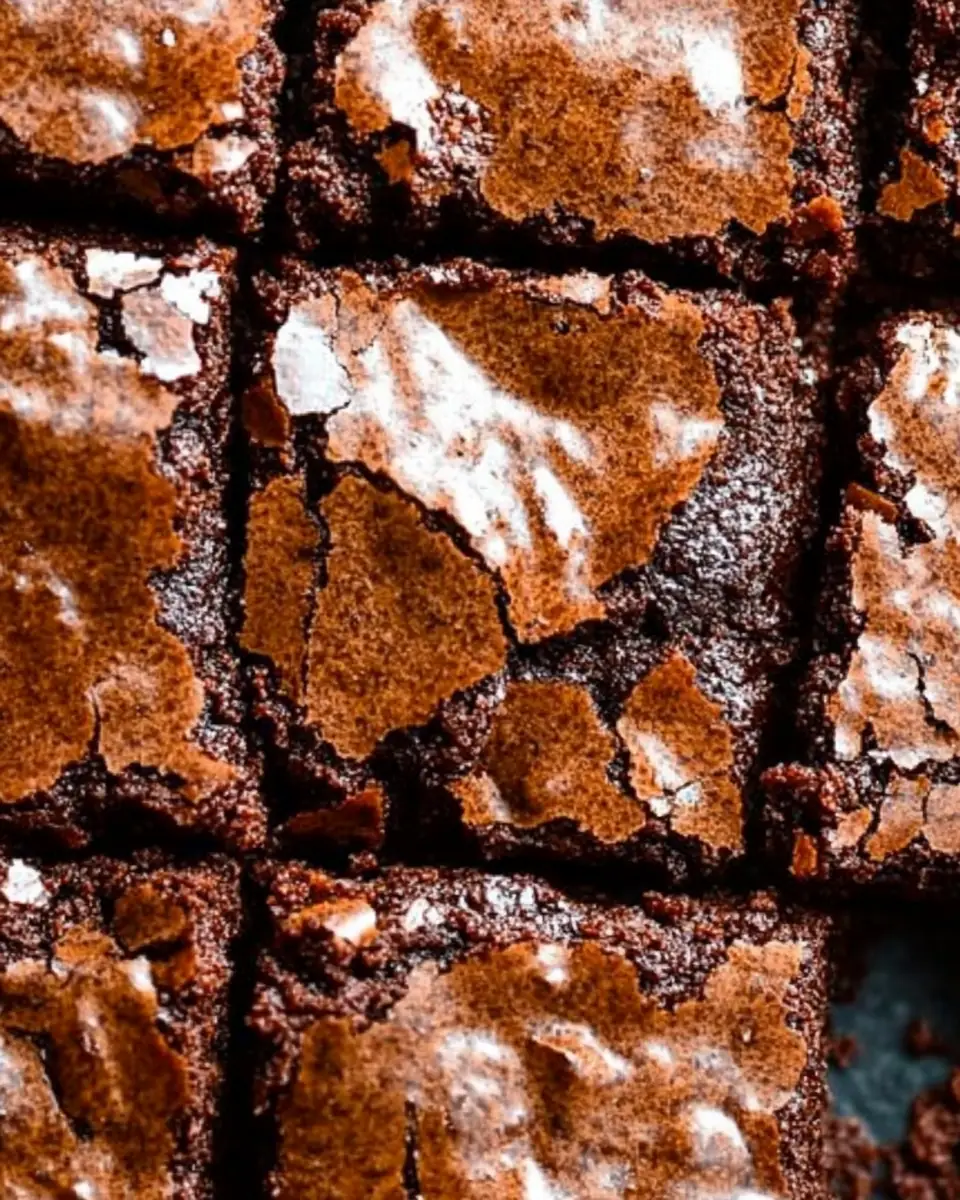
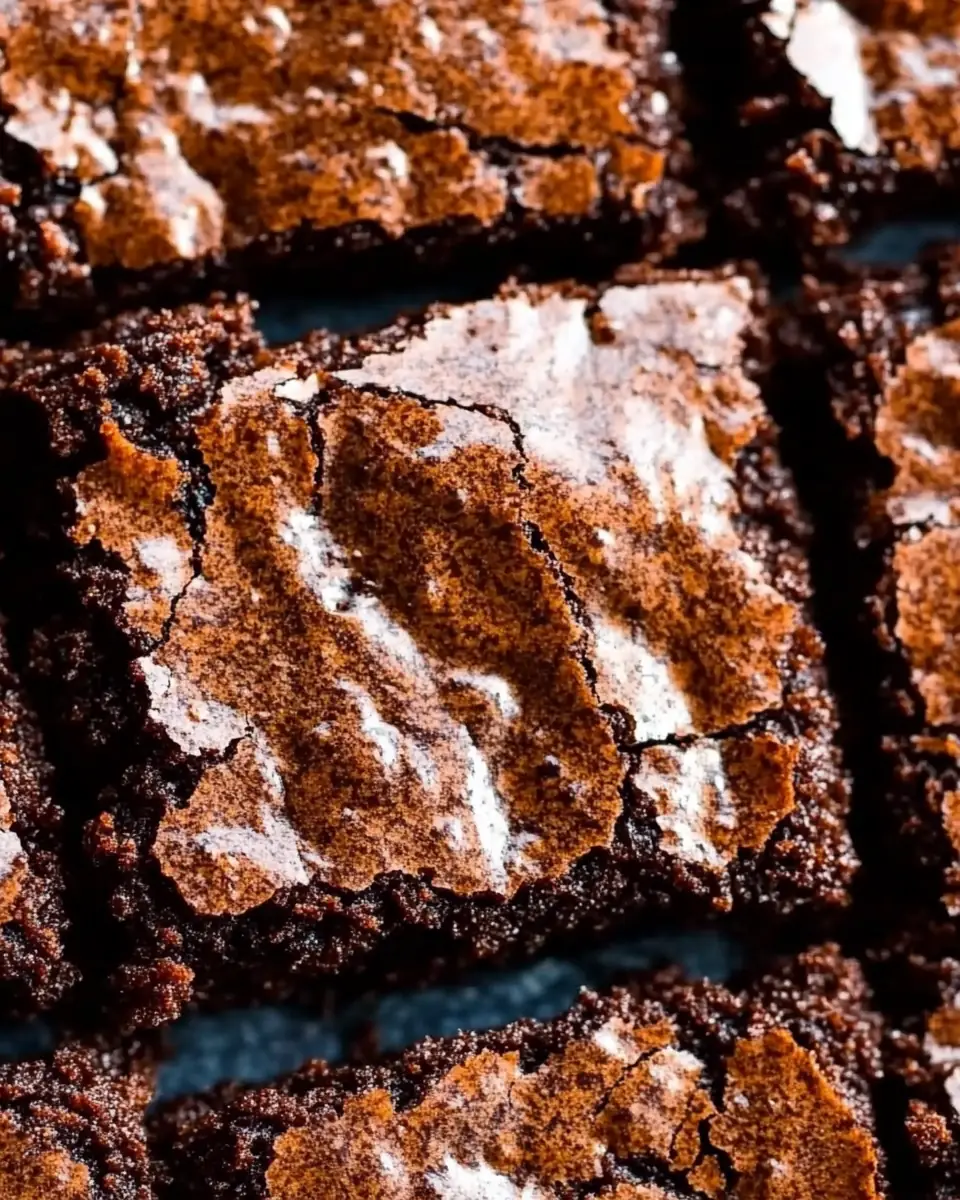
The Best Cocoa Fudge Brownies: A Family Tradition
There’s a reason why brownies hold a special place in our hearts, much like the little black dress of desserts—classic, timeless, and perfect for any occasion. Growing up, Sunday afternoons were synonymous with the rich aroma of chocolate wafting through our home, thanks to my mom’s tradition of baking brownies. The scent was like a warm embrace, drawing us all into the kitchen even before the timer buzzed. Fast forward to today, and I’ve carried this delicious tradition into my own household. There’s just something about that first bite of a rich, gooey brownie that feels like home. Today, I’m thrilled to share my version of The Best Cocoa Fudge Brownies with you. These brownies encapsulate everything a brownie should be: decadent, fudgy, and absolutely irresistible.
Why You’ll Love This Recipe
- Family-Friendly: These brownies are universally adored by kids and adults alike. They’re perfect for family gatherings or a cozy evening at home. The joy of seeing your loved ones savoring each bite is unmatched.
- Easy to Make: With simple, everyday ingredients, you won’t need to run to a specialty store. Everything you need is likely already in your pantry. This convenience means you can whip up a batch whenever the craving strikes, without any hassle.
- Rich Flavor: The combination of cocoa and chocolate chips gives these brownies an intense chocolate flavor that’s sure to satisfy any sweet tooth. The depth of flavor is what makes these brownies stand out from the rest.
- Comfort Food at Its Best: There’s nothing quite like biting into a warm brownie. It’s comfort food that brings a smile to everyone’s face. Whether you’re celebrating a birthday or simply need a pick-me-up, these brownies are the perfect solution.
- Customizable: Add your favorite nuts or a swirl of peanut butter to make these brownies even more special. Customizing them allows you to cater to different preferences and make each batch uniquely yours.
The Recipe
Ingredients
- 1 cup (120g) all-purpose flour
- 1/2 teaspoon baking powder
- 1/2 teaspoon salt
- 1/2 cup (43g) unsweetened cocoa powder
- 1 teaspoon espresso powder (optional, but it enhances the chocolate flavor)
- 3/4 cup (170g) unsalted butter
- 2 tablespoons (28ml) oil (canola, vegetable, or coconut will work)
- 1 and 1/3 cups (265g) granulated sugar (divided)
- 2 large eggs
- 1 large egg yolk
- 2 teaspoons vanilla extract (optional, but recommended)
- 3/4 cup (128 grams) chocolate chips
Instructions
- Preheat your oven to 350 degrees F (175 degrees C).
- Prepare your baking pan by lining a 9×9-inch pan with parchment paper and spraying it lightly with non-stick baking spray. This step ensures easy removal and prevents sticking, preserving those perfect edges.
- Mix the dry ingredients: In a large bowl, sift together the flour, baking powder, salt, cocoa powder, and espresso powder. Sifting helps aerate the ingredients, leading to a smoother batter.
- Melt the butter mixture: In a medium saucepan, combine the butter, oil, and 1/3 cup of the sugar. Heat over medium heat, stirring frequently, until the butter is completely melted. Remove from heat. The melted butter combines seamlessly with the sugar, creating a glossy base for the batter.
- Combine wet ingredients: In a large mixing bowl, whisk together the eggs, egg yolk, vanilla, and remaining sugar until well combined, about 30 seconds. The mixture should be slightly pale and frothy, indicating that the sugar is well incorporated.
- Blend the mixtures: Slowly pour the warm butter mixture into the egg mixture, whisking constantly until completely combined. This gradual blending ensures a smooth batter without scrambling the eggs.
- Incorporate dry ingredients: Add in the dry ingredients and chocolate chips. Using a rubber spatula, gently fold until just combined. Be cautious not to over mix—stop when you see the last trace of dry ingredients. Overmixing can lead to a tougher texture, which we want to avoid for these fudgy treats.
- Bake: Pour the batter into your prepared pan, smooth the top, and bake for 28 to 30 minutes, or until the edges are firm and the top is shiny and slightly cracked. The cracking is a good sign, indicating a perfectly baked brownie.
- Cool: Place the pan on a cooling rack and let the brownies cool completely before slicing. This patience is tough, but it allows the brownies to set and makes cutting them much easier.
Kitchen Tools You’ll Need
- 9×9-inch baking pan: Essential for achieving the right thickness and texture.
- Parchment paper: For easy release and minimal cleanup.
- Large mixing bowl: To accommodate all the ingredients without spillage.
- Medium saucepan: For melting butter and sugar, a crucial step for flavor and texture.
- Rubber spatula: Ideal for gentle mixing, ensuring a tender crumb.
- Whisk: For incorporating air and achieving a smooth, well-mixed batter.
- Cooling rack: Helps brownies cool evenly and prevents condensation from making them soggy.
The Benefits of Each Ingredient
- All-Purpose Flour: Provides structure to the brownies, giving them just enough body without being too cakey. It’s the backbone of the recipe, ensuring that the brownies hold together yet remain soft and chewy.
- Unsweetened Cocoa Powder: The star of the show, it provides deep chocolate flavor without extra sweetness. It’s what makes these brownies truly chocolatey without being overly sweet.
- Espresso Powder: Optional, but it accentuates the chocolate flavor, making the brownies richer. It’s a secret ingredient that elevates the chocolate experience, adding depth without imparting a coffee taste.
- Butter and Oil: A combination of these fats ensures a moist, fudgy texture. Butter adds flavor, while oil keeps the brownies tender. This duo is crucial for achieving that melt-in-your-mouth bite.
- Granulated Sugar: Sweetens the brownies and helps with the shiny, crackly top. It’s the sugar that caramelizes during baking to create that irresistible brownie crust.
- Eggs and Egg Yolk: Bind the ingredients and add richness. The extra yolk contributes to that fudgy texture we love, making the brownies dense and gooey.
- Vanilla Extract: Enhances all the other flavors, adding a subtle depth. A touch of vanilla rounds out the chocolate flavor, making each bite more complex and satisfying.
- Chocolate Chips: Little pockets of melty chocolate throughout the brownies make them extra indulgent. They create moments of surprise with every bite, adding to the rich, chocolatey experience.
What to Serve With This Dish
While these brownies are perfect on their own, you can elevate your dessert experience by pairing them with: – A scoop of vanilla ice cream: The cold, creamy contrast pairs beautifully with warm brownies. The combination is a classic, providing a delightful temperature and texture contrast. – Fresh berries: Add a pop of color and a hint of tartness to balance the sweetness. Berries such as raspberries or strawberries complement the rich chocolate flavors with their natural tartness. – Whipped cream: Light and airy, it complements the dense, fudgy texture. A dollop on top adds a touch of elegance and a creamy finish to the dessert.
Storage & Leftover Tips
- Room Temperature: Store in an airtight container for up to 4 days. This keeps the brownies moist and chewy without drying out.
- Refrigerate: If you prefer a firmer texture, keep them in the fridge for up to a week. Chilled brownies have a more intense flavor and a denser texture, which some find delightful.
- Freeze: These brownies freeze beautifully. Wrap them individually in plastic wrap and place in a freezer bag. They’ll keep for up to 3 months. Just thaw at room temperature when you’re ready to enjoy them again. Freezing them individually allows you to thaw only what you need, ensuring freshness every time.
Tips for the Perfect Brownie
- Don’t Overmix: Overmixing can lead to tough brownies. Mix until just combined for the best texture.
- Keep an Eye on Baking Time: Every oven is different. Start checking your brownies a few minutes before the minimum baking time.
- Let Them Cool: As tempting as it is to dig in immediately, letting the brownies cool will make cutting them easier and allow the flavors to develop fully.
The Joy of Sharing Homemade Brownies
Making delicious food for my family and friends is one of life’s greatest joys, and these brownies are a testament to that. Whether you’re baking for a special occasion or just because, I hope these brownies become a beloved part of your family traditions, just as they are in mine. The act of baking itself is a ritual of love and care, turning simple ingredients into something magical that can be shared and enjoyed together.
In our fast-paced world, taking the time to bake and share a homemade treat like these brownies can create moments of connection and joy. The process of measuring, mixing, and baking is meditative, a way to focus on the present and pour love into something tangible. Sharing the results with others, seeing their faces light up with delight, is a reward that goes beyond the simple act of eating.
For more comforting recipes that bring families together, check out my Easy Homemade Lasagna and Creamy Chicken Alfredo. These dishes, much like the brownies, are about creating moments and memories with loved ones.
If you’re curious to explore more about the science of baking, I recommend visiting Serious Eats for more insights. Understanding the science behind baking can enhance your culinary skills and deepen your appreciation for the art of creating delicious desserts. Happy baking, and enjoy every sweet, chocolatey bite!
In closing, remember that baking, much like any other art, is about experimentation and personalization. Feel free to tweak the recipe to suit your taste, perhaps adding a dash of cinnamon or a handful of walnuts. The kitchen is your canvas, and these brownies are just the beginning of a delightful journey into the world of baking. Enjoy the process, and savor the results with those you hold dear.
The Best Cocoa Fudge Brownies
Ingredients
Equipment
Method
- Preheat oven to 350 degrees (F) (175 degrees C). Line a 9×9-inch baking pan with parchment paper. Spray lightly with non-stick baking spray and set aside.
- In a large bowl, sift together the flour, baking powder, salt, cocoa powder, and espresso powder. Set aside until needed.
- In a medium saucepan, combine the butter, oil, and 1/3 cup of the sugar. Heat over medium heat, stirring frequently, until butter is completely melted. Remove from heat.
- In a large mixing bowl, combine the eggs, egg yolk, vanilla (if using) and remaining sugar. Whisk until well combined, about 30 seconds.
- Slowly, pour the warm butter mixture into the egg mixture, adding it very gradually (a little bit at a time) and whisking constantly until completely combined.
- Add in the dry ingredients and chocolate chips and, using a rubber spatula, slowly stir until just combined. Do not over mix! Stop stirring when you see the last trace of dry ingredients.
- Scrape the batter into the prepared pan and smooth the top. Bake for 28 to 30 minutes or until the edges are firm and the top is shiny and slightly cracked.
- Place pan on a cooling rack and cool completely before slicing.