Red Velvet Truffles: A Sweet Family Tradition
There’s something undeniably heartwarming about a homemade treat that brings everyone together. In my family, that treat is Red Velvet Truffles. These little bites of joy have become a staple in our home, especially around the holidays or whenever we need a pick-me-up. I remember the first time I made these truffles with my kids; the kitchen was filled with laughter, a bit of chaos, and a whole lot of love. We ended up with red velvet crumbs all over the floor and cream cheese on our noses, but the smiles on everyone’s face as we finally bit into those creamy, decadent truffles made it all worthwhile. With just a few simple ingredients and a bit of mixing magic, you too can create these indulgent treats that bring a touch of elegance and comfort to any gathering.
Why You’ll Love This Recipe
- Easy to Make: You don’t need to be a professional chef to whip up these Red Velvet Truffles. With just a handful of ingredients, they come together effortlessly.
- Family-Friendly: This is a perfect recipe to involve the kids. They’ll love rolling the truffles and, of course, sneaking a taste here and there!
- Versatile Coatings: Whether you prefer a dusting of confectioner’s sugar, a coat of granulated sugar, or a dip in melted chocolate, you can customize these truffles to suit your taste.
- Perfect for Any Occasion: These truffles are elegant enough for a party yet simple enough for a cozy night in. They truly are the best of both worlds.
- Long Shelf Life: They can be stored in the fridge for up to 10 days, making them a convenient make-ahead treat.
The Recipe
Ingredients
- 15.25 ounces red velvet cake mix
- 1 cup confectioner’s sugar
- 8 ounces cream cheese – full fat
- 3 tbsp heavy cream (adjust as needed)
- Granulated sugar for rolling (optional)
Instructions
- Mix Ingredients: In the bowl of a stand mixer, combine the cake mix powder, confectioner’s sugar, and cream cheese.
- Achieve Dough Consistency: Mix on low speed until the ingredients start to pull together. If the mixture seems dry, add heavy cream, one tablespoon at a time, until it reaches a dough-like consistency.
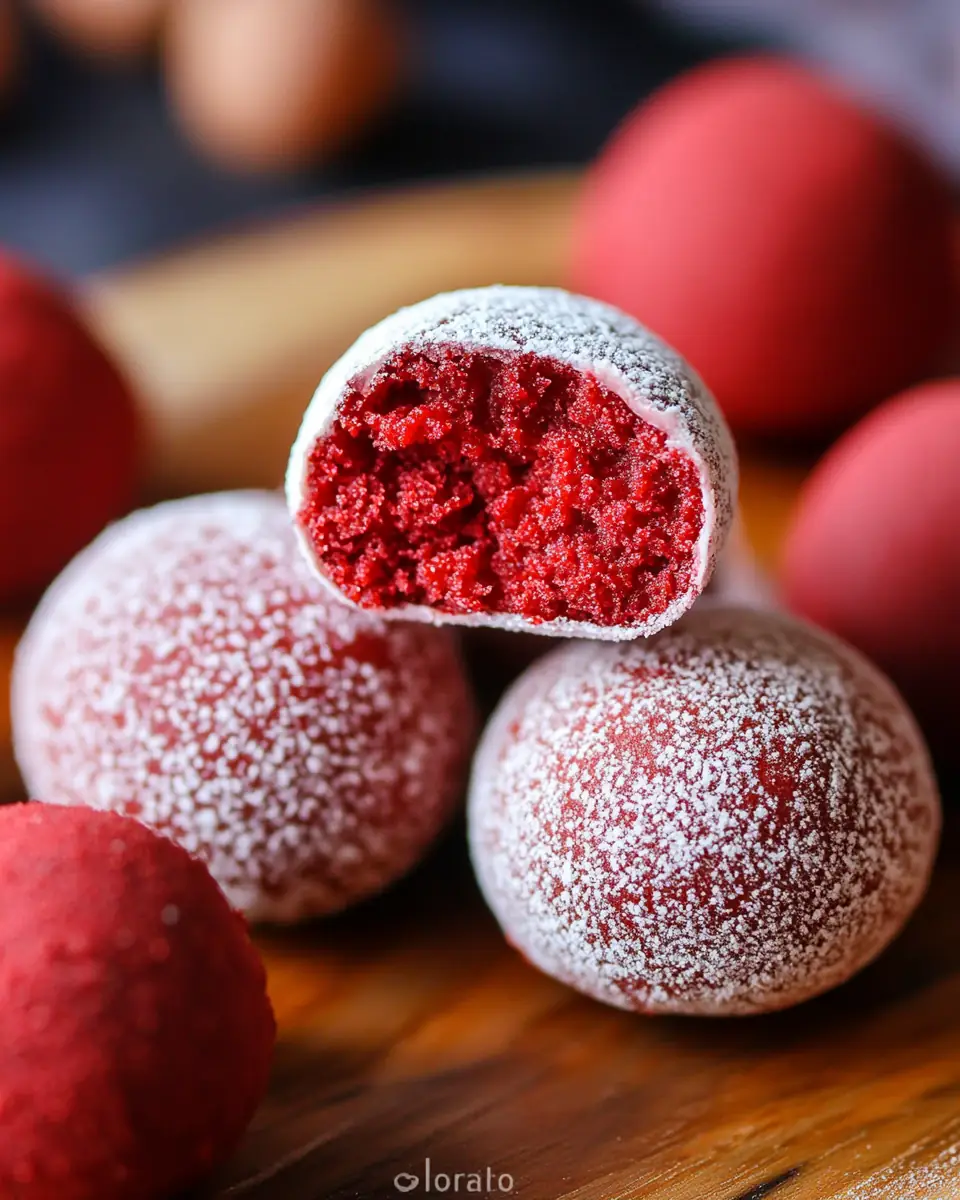
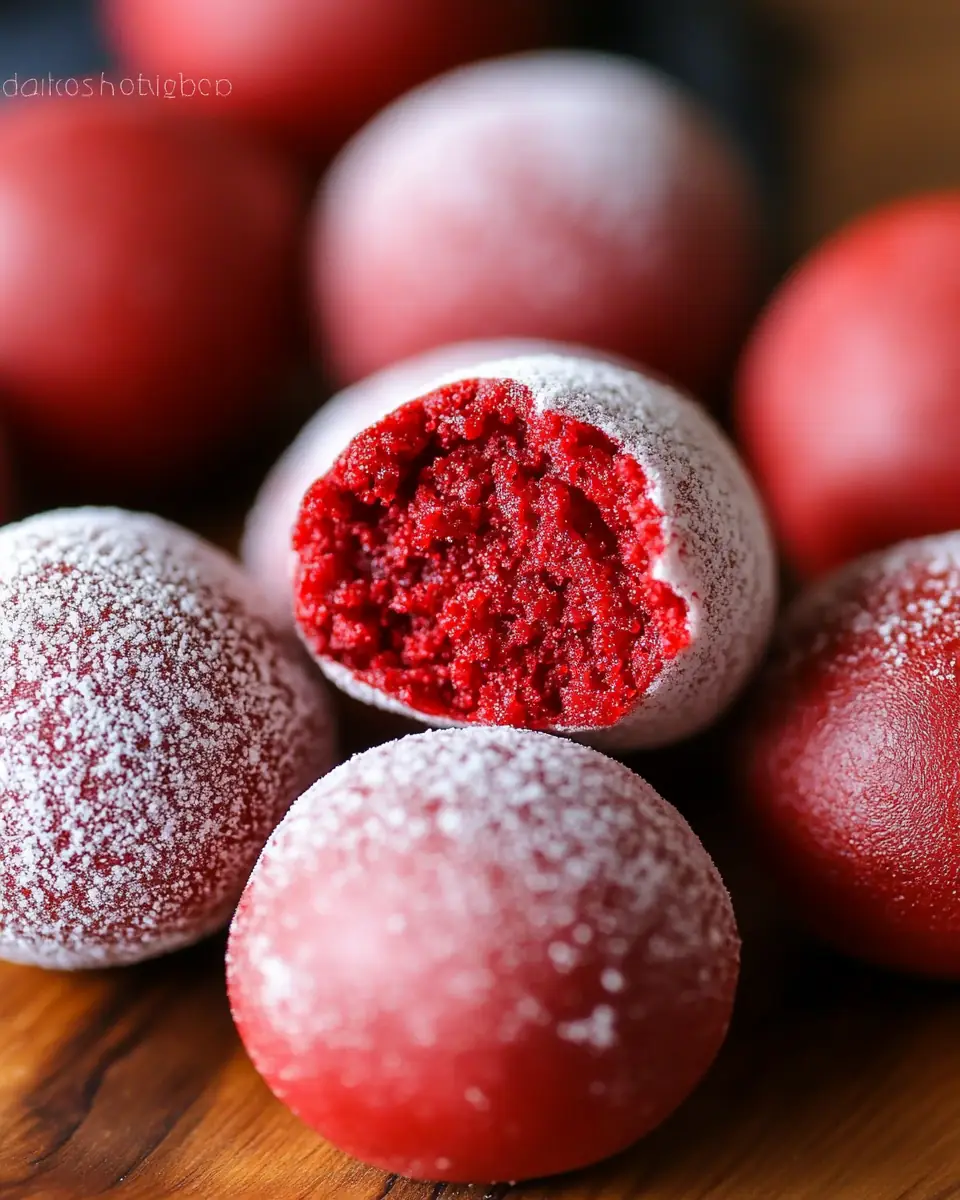
- Form Truffles: Scoop the mixture into tablespoon-sized portions and roll them between your hands to form smooth rounds.
- Coat the Truffles: Place them on a lined baking sheet. You can roll them in confectioner’s sugar, granulated sugar, chopped nuts, or any other coating you prefer. If coating in chocolate, chill them in the refrigerator or freezer before dipping to ensure they hold their shape.
- Store Properly: Store these truffles in the refrigerator for up to 10 days.
Kitchen Tools You’ll Need
- Stand Mixer: Essential for combining all the ingredients smoothly.
- Measuring Cups: For precise ingredient measurements.
- Baking Sheet: To place the formed truffles.
- Mixing Bowl: If you don’t own a stand mixer, a hand mixer and mixing bowl will work just fine.
- Spoon or Cookie Scoop: For portioning the truffle mixture evenly.
The Benefits of Each Ingredient
- Red Velvet Cake Mix: This is the foundation of our truffles, offering that classic red velvet flavor that everyone loves. It’s also a great shortcut to get that cake-like taste without baking a whole cake.
- Confectioner’s Sugar: It adds sweetness and helps achieve that smooth, creamy texture in the truffles.
- Cream Cheese: This is where the magic happens. It binds everything together while providing a rich, tangy flavor that balances the sweetness perfectly.
- Heavy Cream: Used to adjust the consistency, it ensures the truffles are soft and creamy.
- Granulated Sugar: If you choose to roll the truffles in it, it adds a slight crunch and extra sweetness.
Customizing Your Truffles
One of the joys of making Red Velvet Truffles is the customization options. Here are some ideas to make them your own:
- Chocolate Lovers: Melt white or dark chocolate and dip each truffle for a rich, shell-like coating. You can then drizzle contrasting chocolate for a decorative touch.
- Nutty Delight: Roll the truffles in finely chopped pecans or walnuts for a nutty flavor and crunchy texture.
- Festive Sprinkles: Use colorful sprinkles to coat the truffles, making them perfect for festive occasions or themed parties.
- Coconut Coating: For a tropical twist, roll the truffles in shredded coconut.
What to Serve With This Dish
While these truffles are delightful on their own, they pair wonderfully with a few other treats:
- A Warm Cup of Coffee or Hot Chocolate: The richness of the truffles complements a warm beverage perfectly, making it an ideal afternoon treat.
- Fruit Platter: A vibrant fruit platter with fresh berries can balance the sweetness of the truffles and add a refreshing contrast.
- Sparkling Wine: For a more sophisticated pairing, serve these truffles with a glass of sparkling wine. The bubbles help cleanse the palate between bites.
For more delicious pairing ideas, check out my Chocolate Chip Cookies and Classic Pound Cake recipes on the blog. They’re family favorites that go beautifully with these truffles.
Storage & Leftover Tips
These Red Velvet Truffles are just as easy to store as they are to make:
- Refrigerator: Store the truffles in an airtight container in the refrigerator. They’ll keep fresh for up to 10 days, making them a great make-ahead option for parties or gatherings.
- Freezing: If you want to keep them longer, you can freeze the truffles. Place them on a baking sheet and freeze until solid, then transfer them to a freezer-safe bag or container. They’ll last up to a month.
- Serving After Storage: When you’re ready to enjoy, let them sit at room temperature for about 10 minutes to soften slightly before serving.
The Tradition of Red Velvet
The history of red velvet cake is as rich and intriguing as its flavor. Originating in the early 20th century, red velvet cake quickly became a beloved dessert in American cuisine. Its unique color and luxurious texture made it a standout at gatherings and celebrations. The addition of cocoa and buttermilk in traditional recipes creates a subtle chocolate flavor that is both unique and comforting. This rich tradition is honored in our truffle recipe, capturing the essence of the classic cake in a bite-sized delight.
Tips for Success
- Room Temperature Ingredients: Ensure your cream cheese is at room temperature to mix smoothly without lumps.
- Chill Before Coating: If you plan to coat your truffles in chocolate, chilling them first helps maintain their shape during the dipping process.
- Uniform Size: Use a cookie scoop to ensure all truffles are the same size, ensuring even chilling and coating.
Sharing the Joy
Remember, the joy of cooking and sharing food lies in the memories we create with our loved ones. These Red Velvet Truffles are more than just a treat; they’re a way to connect with family and friends, creating sweet moments that last a lifetime. Whether you’re making them for a special occasion or just because, these truffles are sure to become a beloved family tradition. Enjoy every bite and happy cooking!
Your Turn to Create
I hope this recipe brings as much joy to your kitchen as it does to mine. Whether you’re an experienced baker or new to the kitchen, these Red Velvet Truffles are a delightful project that promises not only a delicious result but also the opportunity to create cherished memories with loved ones. So, gather your ingredients, invite your family into the kitchen, and start rolling! Enjoy the process and indulge in the sweet rewards of your efforts.
The Science Behind the Perfect Truffle
Understanding the science behind the ingredients can elevate your truffle-making experience. The balance of moisture and fat is crucial in achieving the perfect texture. The cream cheese, with its high-fat content, provides a creamy base that holds the structure of the truffle while imparting a tangy flavor that complements the sweetness of the confectioner’s sugar. The heavy cream acts as a moisture agent, ensuring that the mixture is pliable and easy to shape, while the cake mix introduces the classic red velvet flavor, complete with its subtle cocoa tones and vibrant color.
When you incorporate these ingredients, the mixing process is where the transformation happens. The stand mixer allows for a consistent distribution of ingredients, ensuring every bite is as flavorful as the last. The low-speed mixing prevents over-aeration, which could lead to a crumbly texture rather than the desired smooth, rich consistency.
Exploring Further Customization
For those who love to experiment, consider infusing the truffle mixture with different flavors. A teaspoon of vanilla extract can enhance the sweetness, while a dash of espresso powder can deepen the cocoa notes, making for a more sophisticated flavor profile. For a festive touch, a hint of peppermint extract can transform these truffles into a holiday favorite.
Moreover, the coatings offer another layer of customization. While traditional coatings like chocolate and nuts are popular, consider experimenting with more adventurous options such as crushed cookies or freeze-dried fruit powders. These not only add flavor but also texture, creating a dynamic eating experience.
The Emotional Connection of Cooking Together
Cooking is not just about the end result; it’s about the journey and the connections made along the way. When you involve your family, especially children, in the kitchen, you’re not just teaching them a recipe; you’re imparting life skills and creating a nurturing environment where creativity and teamwork flourish. As they measure, mix, and roll, they learn patience and precision. And as they watch their efforts turn into delicious treats, they gain confidence and a sense of accomplishment.
In my own experience, these Red Velvet Truffles have been the backdrop to many cherished memories. They remind me of the importance of slowing down and savoring the moment. In a world that often rushes us, taking the time to create something with your hands, surrounded by loved ones, is a precious gift.
Bringing it All Together
In conclusion, these Red Velvet Truffles are more than just a dessert; they are a celebration of tradition, family, and creativity. From their humble beginnings in your kitchen to their elegant presentation at your table, they carry with them the laughter, love, and care that went into making them. Whether you’re enjoying them on a quiet evening or sharing them at a bustling family gathering, they are sure to bring smiles and delight.
So, as you embark on your truffle-making adventure, remember to embrace the process and the joy it brings. May these Red Velvet Truffles become a beloved part of your family traditions, just as they have in mine. Happy cooking and even happier tasting!
Red Velvet Truffles
Ingredients
Equipment
Method
- In the bowl of a stand mixer, combine the cake mix powder, confectioner’s sugar, and cream cheese.
- Mix on low until the ingredients start to pull together. If the mixture is dry, add the heavy cream 1 tbsp at a time until the mixture pulls together into a dough-like consistency.
- Scoop the mixture into tablespoon-sized portions and roll between your hands to smooth into rounds.
- You can either place them on a lined baking sheet or roll them in confectioner’s sugar, granulated sugar, chopped nuts or any other additional coating you like.
- If you decide to coat them in chocolate, be sure to chill them in the refrigerator or freezer before dipping so that they hold their shape.