

There’s something deeply nostalgic and satisfyingly zippy about crunchy tangy refrigerator pickled vegetables. Maybe it’s the way the vinegar bite hits your taste buds just right or how the carrots crunch like a summer garden under your teeth. For me, it started with Grandma’s ancient pickle jar that seemed to refill itself magically. No boiling water bath, no fancy equipment, just a fridge, a bunch of veggies, and a whole lot of sass.
This is my no-fuss, full-flavor method to transform raw, humble veggies into a snack-worthy sidekick that jazzes up sandwiches, charcuterie boards, or even late-night munchie raids. A little sweet, a lot tangy, and kissed with just enough heat to keep things interesting. Plus, you’ll feel like a home-preserving goddess without turning your kitchen into a sauna.
So clear out some fridge space, round up those veggies on the verge of retirement, and get ready to pickle like a pro. Trust me, this is the refrigerator recipe you didn’t know you needed.
Why You’ll Love This Crunchy Tangy Refrigerator Pickled Vegetables Recipe
- No canning equipment required: Skip the boiling pots and steamy kitchen. All you need is a fridge and a few clean jars to get started.
- Quick and easy prep: From chopping to chilling, you’re looking at under 20 minutes of actual effort. Perfect for busy weeknights.
- Crispy results that last: These pickled veggies stay fresh and crisp for up to a month, holding their flavor like champs.
- Versatile for meals and snacks: Use them to brighten up your burgers, wrap them in sandwiches, or munch on them straight from the jar.
- Make it your own: Change up the spice level, swap in your favorite vegetables, or even add fresh herbs for your own signature batch.
Ingredients for This Recipe
For the Vegetables:
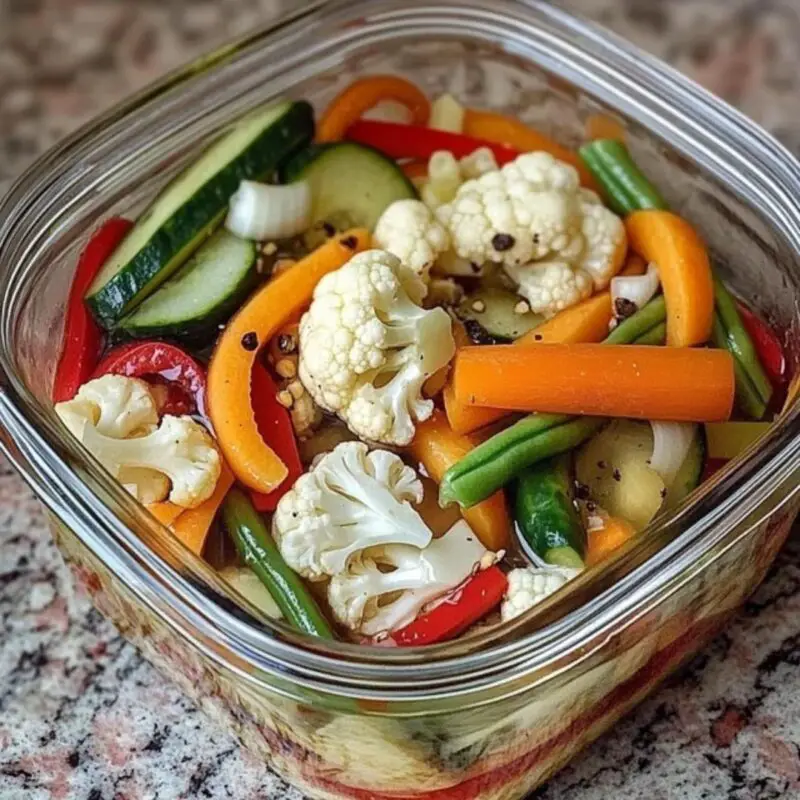
- 2 cups cauliflower florets: Break into bite-size pieces for the perfect crunch.
- 1 cup sliced carrots: Their natural sweetness plays beautifully with the vinegar brine.
- 1 cup sliced cucumbers: Choose firm ones like Persian or English cucumbers for that satisfying snap.
- 1 red bell pepper, sliced into strips: Adds bright color and sweet flavor.
- 1 cup green beans, trimmed: Keep them whole or cut in half depending on your jar size.
- 3 cloves garlic, minced: Essential for that savory depth of flavor.
For the Pickling Brine:
- 2 cups white vinegar: The base that gives pickles their signature zing.
- 2 cups water: Balances the acidity so it’s not too overpowering.
- 2 tablespoons salt: Helps preserve and enhance flavor.
- 1 tablespoon sugar: Just enough sweetness to round everything out.
- 2 teaspoons mustard seeds: Add a subtle tang and visual flair.
- 1 teaspoon black peppercorns: For a mild peppery kick.
- ½ teaspoon red pepper flakes: Optional but gives that tiny firecracker of heat.
How to Make This Recipe
Prepare the Vegetables:
- Chop and prep your veggies: Wash and slice everything to your liking. Keep them roughly the same size for even pickling.
- Mix it all together: Toss cauliflower, carrots, cucumbers, bell pepper, and green beans in a large bowl.
- Pack the jars: Carefully layer the veggies into clean jars. Alternate colors and shapes for a pretty presentation.
- Add garlic: Divide the minced garlic between jars, tucking it into the veggie layers.
Make the Pickling Brine:
- Combine brine ingredients: In a saucepan, mix vinegar, water, salt, sugar, mustard seeds, peppercorns, and red pepper flakes.
- Heat until dissolved: Bring to a gentle boil while stirring. Make sure salt and sugar fully dissolve.
- Let it rest a minute: Remove from heat and let the brine sit for just a few moments to mellow slightly.
- Pour over veggies: Carefully pour the warm brine into the jars, making sure all the veggies are covered.
Assemble and Chill:
- Seal and settle: Tap the jars gently to release trapped air bubbles. Add more brine if needed, then seal tightly.
- Cool to room temp: Let the jars cool completely on the counter. Don’t rush this step.
- Fridge it up: Move the cooled jars into the refrigerator. Wait at least 24 hours before tasting.
- Flavor develops over time: Best taste usually hits around day three, but they’re still snackable sooner.
Expert Cooking Tips
- Use only the freshest vegetables: Crispness at the start ensures crunchy results at the end. Don’t try to revive limp produce.
- Always use clean, sterilized jars: A hot soapy wash and rinse goes a long way in keeping your pickles fresh longer.
- Don’t overfill the jars: Leave a little space at the top so the brine can fully cover the veggies.
- Make it milder or spicier: Adjust red pepper flakes to taste or toss in a sliced jalapeño for more heat.
- Label your jars: Add the date and any special ingredients so you remember your winning combos.
Proper Storage
- Counter Storage: Not safe for long-term storage. Always refrigerate after cooling. Only keep on the counter while jars are cooling.
- Refrigerator Method: Store sealed jars in the fridge for up to 4 weeks. Keep veggies submerged in brine for best results.
- Freezer Option: Not recommended. The texture of pickled vegetables changes too much when frozen and thawed.
Variations and Substitutions
Dietary Adaptations:
- Gluten-Free Version: This recipe is naturally gluten-free as long as your vinegar is certified gluten-free.
- Dairy-Free Alternative: Already dairy-free. Nothing to swap, just crunch and enjoy!
Creative Twists:
- Make them Mediterranean: Add oregano, thyme, and kalamata olives for a briny, herb-filled flair.
- Give it a Southeast Asian vibe: Add fresh ginger slices and swap in rice vinegar.
- Go sweet and spicy: Increase sugar to 2 tablespoons and toss in a few chili slices or jalapeños.
Healthier Swaps Without Losing the Magic
- Cut the salt: Use just 1 tablespoon if watching sodium.
- Lower sugar: Try stevia or monk fruit for a low-glycemic option.
- Vinegar swap: Apple cider vinegar for a funkier, gut-healthy bite.
Still crave-worthy. Still crunchy. Still fabulous.
What Goes with This Recipe
- Pile onto burgers: Adds a bright crunch to rich grilled meats.
- Top off grain bowls: The tangy bite cuts through earthy grains beautifully.
- Serve alongside cheese boards: A sharp, vinegary contrast to creamy or aged cheeses.
- Stuff into wraps: Adds crunch and zing without extra sauces.
- Snack straight from the jar: Late-night fridge raids have never tasted better.
Leftover Remix
Got leftovers? Here’s how to level up:
- Chop and toss into potato or egg salad
- Add to tuna for a tangy twist
- Blend with olive oil for a zippy vinaigrette
- Finely dice and mix into deviled eggs
Leftovers never tasted this lively.
Gift It Like a Pro
Wrap up a jar with twine and a handwritten tag (“Pickled with Love 💚”). Add to a hostess basket with crackers and cheese. Perfect for:
- Holiday gifts
- Teacher appreciation
- New neighbor hellos
- Pickle-obsessed friends (you know who you are)
FAQ
Can I use apple cider vinegar instead of white vinegar?
Yes, it gives a slightly fruity, mellow flavor that’s great for pickles. Just avoid darker vinegars like balsamic that can overpower and discolor the veggies.
How long do these pickled vegetables last?
Properly refrigerated, they’ll stay crisp and tasty for about 4 weeks. Just make sure veggies remain submerged in the brine.
Can I reuse the brine for a second batch?
You can, but it won’t be as effective. The flavors weaken with reuse, and it won’t preserve as well. Better to make fresh brine.
Do I have to use all the veggies listed?
Not at all! Use what you have on hand. Zucchini, radishes, snap peas, asparagus, and even red onion all work beautifully.
Can kids help make these pickles?
Absolutely. They can wash veggies, layer jars, and count spices. Just leave slicing and boiling the brine to the grown-ups.
Final Thought
Crunchy tangy refrigerator pickled vegetables are the ultimate fridge staple for busy weeks, snacky moods, and sandwich emergencies. Whether you’re new to pickling or a vinegar veteran, this recipe is forgiving, flexible, and full of flavor. It’s the kind of kitchen project that makes you feel like a domestic goddess without ever turning on the stove. Now go forth, pickle boldly, and maybe share a jar or two (or not, no judgment).
Print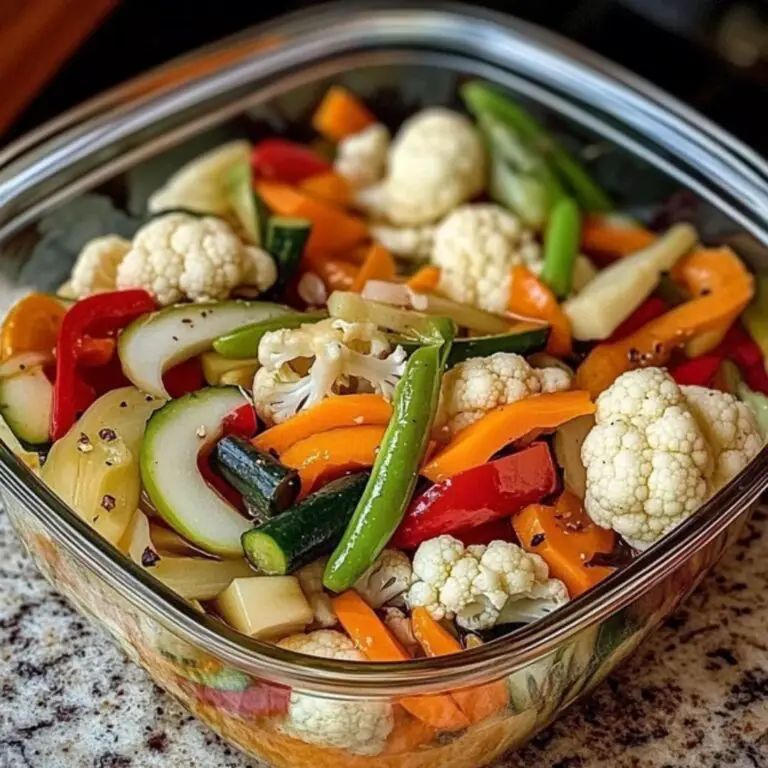
Crunchy Tangy Refrigerator Pickled Vegetables
Crunchy tangy refrigerator pickled vegetables ready in minutes! Quick, crisp, flavorful fridge pickles perfect for snacks, sides, and sandwich toppers.
- Total Time: 20 minutes
Ingredients
• 2 cups cauliflower florets
• 1 cup sliced carrots
• 1 cup sliced cucumbers
• 1 red bell pepper, sliced into strips
• 1 cup green beans, trimmed
• 3 cloves garlic, minced
• 2 cups white vinegar
• 2 cups water
• 2 tablespoons salt
• 1 tablespoon sugar
• 2 teaspoons mustard seeds
• 1 teaspoon black peppercorns
• 1/2 teaspoon red pepper flakes (optional)
Instructions
- Prepare the vegetables:
In a large bowl, combine the cauliflower florets, sliced carrots, sliced cucumbers, red bell pepper strips, and trimmed green beans. - Prepare the pickling liquid:
In a saucepan, combine the white vinegar, water, salt, sugar, mustard seeds, black peppercorns, and red pepper flakes (if using). - Boil the liquid:
Bring the mixture to a boil over medium-high heat, stirring until the salt and sugar are fully dissolved. - Pour over vegetables:
Carefully pour the hot pickling liquid over the mixed vegetables in the bowl, making sure all vegetables are completely covered. - Cool to room temperature:
Let the mixture sit at room temperature until it cools completely. - Transfer to jars:
Once cooled, transfer the vegetables and pickling liquid into clean jars. Make sure the vegetables are fully submerged in the liquid. - Seal and refrigerate:
Seal the jars tightly with lids and place them in the refrigerator. - Let them pickle:
Allow the vegetables to pickle in the fridge for at least 24 hours before eating for best flavor.
- Prep Time: 15 minutes
- Cook Time: 5 minutes
- Method: No-Cook
Keywords: pickled vegetables, refrigerator pickles, crunchy pickles, quick pickles, tangy pickles, homemade pickles, no canning pickles