Hey there, fellow food lover! Mateo here, welcoming you back to my cozy kitchen corner where delicious family meals are always on the table. I’m excited to share a recipe that’s become a favorite in our home: Air Fryer Duck Legs. This dish is perfect for those special dinners where you want to impress without spending all day in the kitchen. Trust me, it’s easier than you think, and the results are downright succulent.
Introduction
I still remember the first time I made duck legs at home. It was a winter evening, the kind where the cold wind makes you crave something hearty and comforting. I wanted to create something special for my family without the fuss of a long cooking process. That’s when the air fryer came to the rescue. It transformed a potentially daunting task into a simple, delightful experience. Duck legs, with their rich flavor and crispy skin, bring a little bit of restaurant magic to your dining room, and I’m thrilled to share this with you.
Why You’ll Love This Recipe
Here’s why I think you’re going to adore these Air Fryer Duck Legs:
- Quick and Convenient: With only 10 minutes prep time and 30 minutes cook time, this recipe fits even the busiest of schedules. You can prepare side dishes or set the table while the duck cooks, maximizing your time in the kitchen. The efficiency of this method means you can whip up an elegant meal even on a weeknight.
- Family-Friendly: The irresistible aroma of crispy duck skin will bring everyone to the table in no time. Even picky eaters find it hard to resist the golden, crackling skin and juicy meat. It’s a fantastic way to introduce new flavors to those who may not have tried duck before.
- Comfort Food at Its Best: This dish offers that cozy, comforting feeling we all crave, perfect for family dinners. Imagine a cozy night in, with the family gathered around the table, enjoying a meal that feels both special and homely. The richness of the duck, paired with its crispy exterior, makes it a standout dish for any occasion.
- Simple Ingredients: Using everyday ingredients like olive oil, salt, and spices, you won’t need a special trip to the grocery store. These pantry staples bring out the best in the duck without overshadowing its natural flavors. This simplicity makes it accessible, even for those new to cooking duck.
- Healthy and Delicious: The air fryer method reduces the need for excess oil, making this a lighter choice without sacrificing flavor. You get all the deliciousness of fried duck without the extra calories from deep frying. It’s a guilt-free indulgence that doesn’t compromise on taste.
The Recipe
Prep time: 10 minutes
Cook time: 30 minutes
Servings: 4
Calories: Approximately 350 per serving
Ingredients:
- 4 duck legs
- 1 tablespoon olive oil
- 1 teaspoon salt
- 1 teaspoon black pepper
- 1 teaspoon garlic powder
- 1 teaspoon smoked paprika
Instructions:
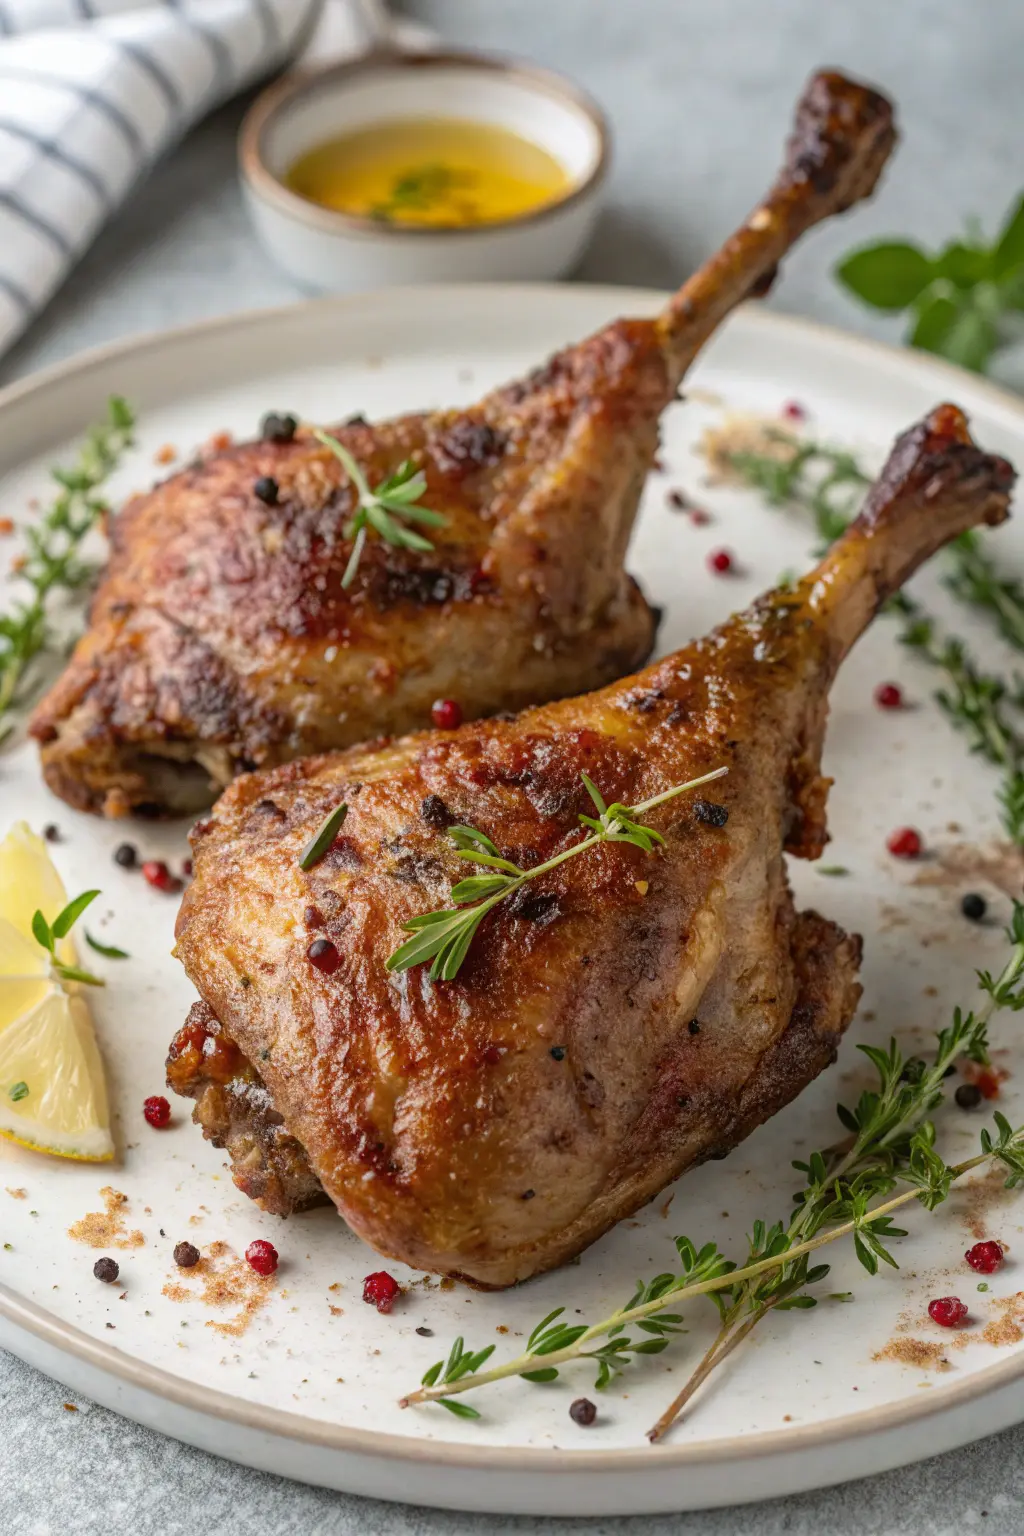
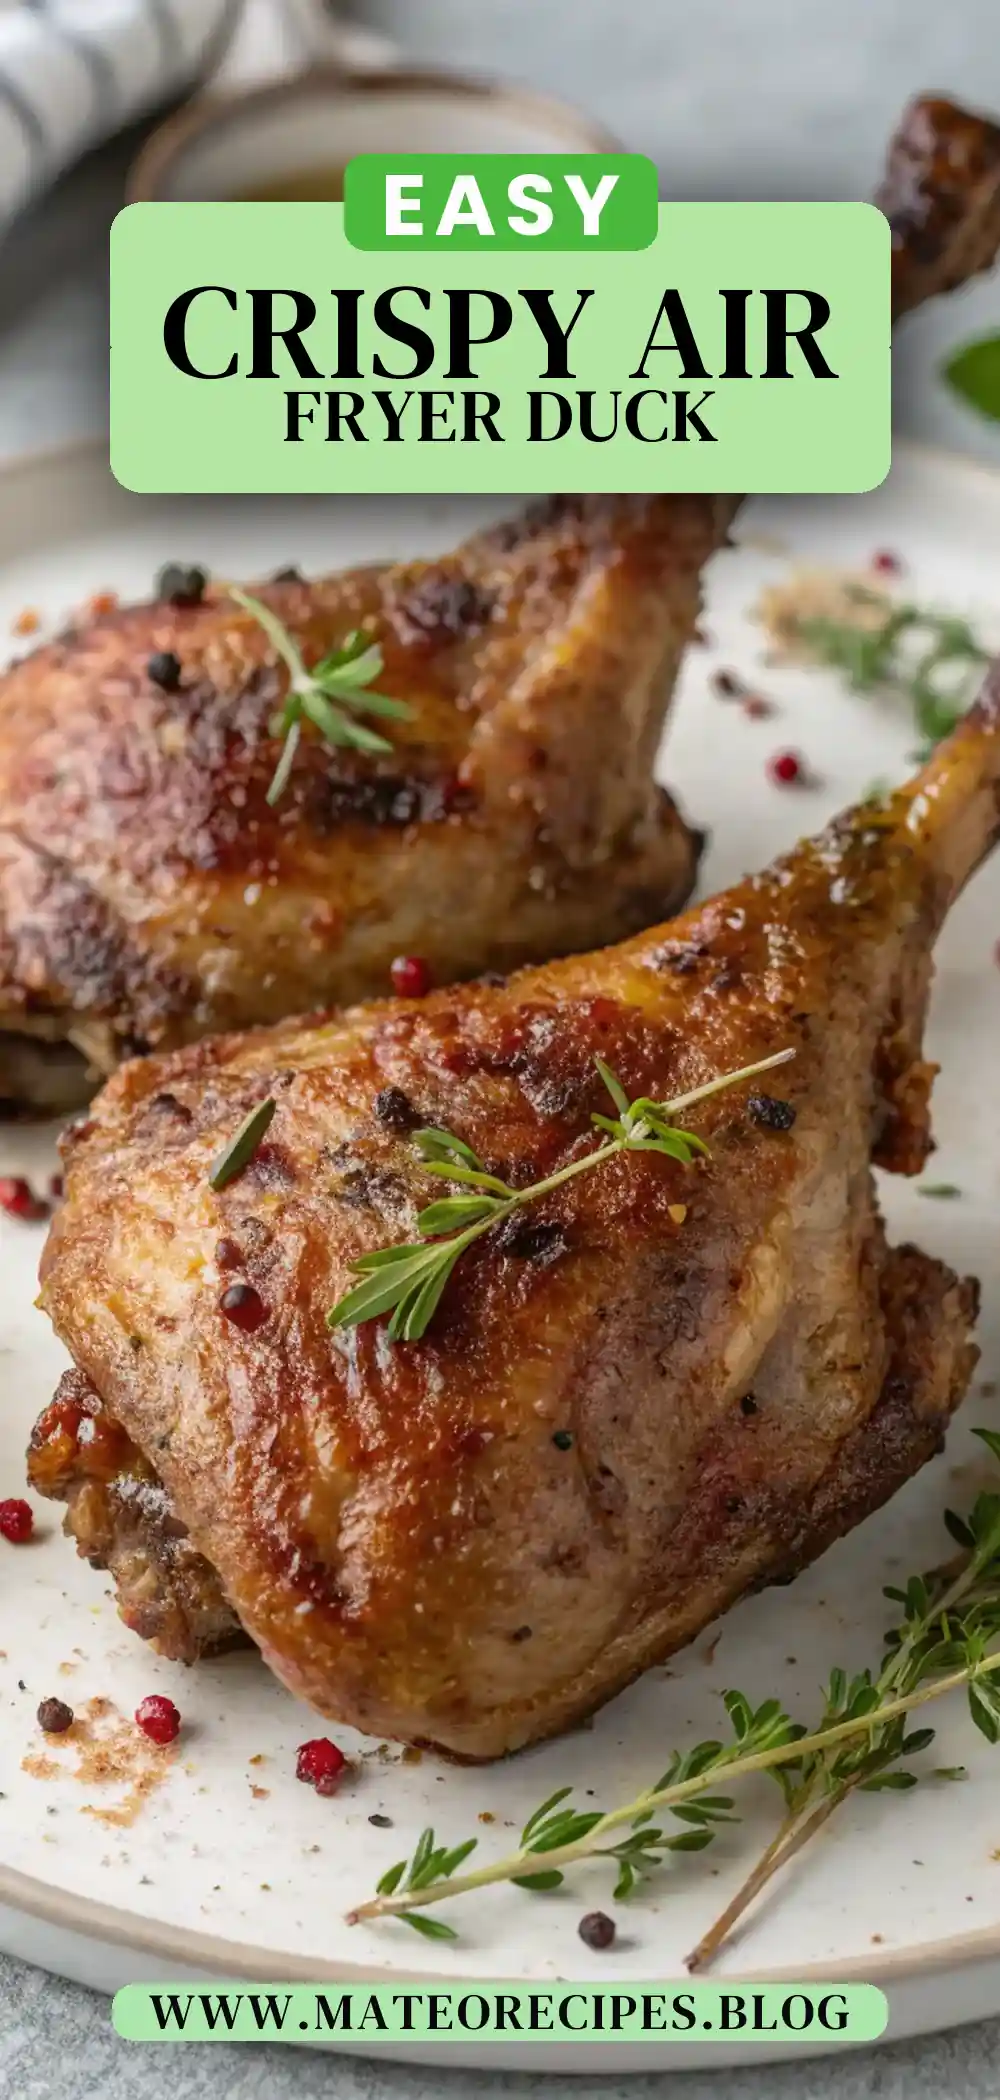
- Pat the Duck Legs Dry: Start by removing excess moisture with paper towels. This step is key to achieving that crispy skin. The drier the skin, the better it will crisp up in the air fryer. Make sure to pat them thoroughly, as moisture can hinder the browning process.
- Prepare the Spice Mixture: Mix together the olive oil, salt, black pepper, garlic powder, and smoked paprika in a bowl. Make sure the spices are well combined to ensure even distribution. The blend of spices creates a harmonious balance that enhances the duck’s natural flavors.
- Coat the Duck Legs: Rub the spice mixture evenly over each duck leg. This ensures every bite is flavorful. Take your time to massage the spices into the skin and meat for maximum infusion. A thorough coating ensures the spices penetrate, elevating the taste experience.
- Preheat the Air Fryer: Set it to 400°F (200°C) and let it preheat for about 5 minutes. Preheating is crucial for achieving a crispy exterior. An even temperature ensures the duck cooks through while maintaining its juiciness.
- Cook the Duck: Place the legs skin-side down in the air fryer basket. Avoid overcrowding for even cooking. Cook for 15 minutes. The initial skin-side down placement helps render the fat, leading to crispier skin. The rendered fat adds flavor and aids in achieving that desirable crispness.
- Flip and Continue Cooking: Turn the duck legs skin-side up and cook for another 15 minutes or until the internal temperature reaches 165°F (74°C). Flipping ensures even cooking and a crispy finish. This step is vital for ensuring the meat is cooked to perfection.
- Let It Rest: Allow the duck legs to rest for 5 minutes before serving. This helps the juices redistribute, keeping the meat tender. Resting is essential for juicy, flavorful meat. It allows the fibers to relax, resulting in more tender bites.
Helpful Tip: For those who love extra crispy skin, extend the cooking time by 2–3 minutes, but keep a watchful eye to prevent burning. The air fryer can quickly go from crispy to burnt, so vigilance is key. Adjusting the cooking time is an easy way to tailor the recipe to your personal preference.
Kitchen Tools You’ll Need

To make these duck legs, you’ll need:
- An air fryer (a must-have for this recipe): Choose one that has a basket large enough to fit all the duck legs without overlapping. A spacious basket ensures even air circulation around the duck.
- Mixing bowl: For combining the olive oil and spices smoothly. A medium-sized bowl should suffice for easy mixing and coating.
- Paper towels: Essential for drying the duck legs and ensuring crispy skin. They help remove surface moisture that can prevent optimal browning.
- Measuring spoons: To accurately measure out your spices and oil. Precision in measurements ensures the balance of flavors.
Having these tools on hand will make your cooking experience smooth and enjoyable. They ensure precision and ease, especially when you’re working with rich ingredients like duck. A well-equipped kitchen is key to stress-free cooking.
The Benefits of Each Ingredient
Every ingredient in this recipe plays a crucial role:
- Duck Legs: Rich in flavor and perfect for a hearty meal. Duck meat is known for its robust taste, unlike any other poultry, making it an exciting choice for special dinners. Its high-fat content ensures moist, flavorful meat.
- Olive Oil: Helps in crisping up the skin while adding a subtle richness. It also acts as a medium to distribute the spices evenly over the duck legs. Olive oil is a healthier fat choice that contributes to the duck’s luxurious mouthfeel.
- Salt and Pepper: Essential seasonings that enhance the natural flavors of the duck. They bring out the savory notes, making the meat taste more vibrant. These basic seasonings are fundamental in any savory dish.
- Garlic Powder: Adds a depth of flavor that pairs beautifully with the duck. Its mild pungency complements the richness of the duck without overpowering it. Garlic and duck are a time-tested pairing that never disappoints.
- Smoked Paprika: Offers a smoky, slightly sweet flavor that elevates the dish. It gives the duck a beautiful color and a hint of smokiness that mimics outdoor grilling. Smoked paprika adds complexity and a subtle warmth to the flavor profile.
What to Serve With This Dish
Pair these delicious duck legs with sides that complement their rich flavor. Here are a few suggestions:
- Mashed Potatoes: Creamy and buttery, they soak up the duck juices perfectly. You can add roasted garlic or herbs like chives to enhance their flavor. Mashed potatoes provide a comforting base that balances the richness of the duck.
- Roasted Vegetables: Carrots, Brussels sprouts, or sweet potatoes roasted to caramelized perfection make a great accompaniment. Their natural sweetness pairs well with the savory duck. Roasting vegetables brings out their natural sugars, complementing the savory duck.
- Simple Green Salad: A refreshing contrast to the richness of the duck. Include a mix of greens, such as arugula and spinach, with a light vinaigrette to balance the meal. A crisp salad cuts through the richness, offering a palate-cleansing bite.
For more side ideas, check out my Garlic Mashed Potatoes or Simple Green Salad recipes. These sides are designed to complement the star of the show—the duck legs. Each pairing enhances the meal experience without overshadowing the duck.
Storage & Leftover Tips
If you have any leftovers, here’s how to keep them delicious:
- Refrigerate: Place duck legs in an airtight container and store in the fridge for up to 3 days. This helps maintain their freshness and flavor. Proper storage prevents the duck from drying out.
- Reheat: Use the air fryer to reheat, setting it to 350°F (175°C) for about 8 minutes to regain that crispy skin. Reheating in the air fryer keeps the skin crisp and the meat juicy. The air fryer is ideal for reheating as it mimics the initial cooking method.
- Freeze: Wrap each leg individually in foil and place in a freezer-safe bag. They’ll keep for up to 2 months. When you’re ready to enjoy them again, thaw in the refrigerator before reheating. Freezing in portions makes it easy to enjoy later without committing to a whole meal.
For more tips on storing leftovers, you might find this guide on food storage useful. Proper storage ensures your duck legs remain as delicious as the day you made them. Knowing how to store and reheat properly can make all the difference in preserving flavor and texture.
In conclusion, these Air Fryer Duck Legs are not just a meal; they’re a delightful experience. They bring the family together around the table, creating memories and sharing laughter. I hope this recipe finds a special place in your home, just as it has in mine. Enjoy cooking, enjoy eating, and remember—I’m always here to help make your time in the kitchen joyful and rewarding. Happy cooking!

Air Fryer Duck Legs
Ingredients
Equipment
Method
- Pat the duck legs dry with paper towels to remove excess moisture.
- In a bowl, mix olive oil, salt, black pepper, garlic powder, and smoked paprika.
- Rub the spice mixture all over the duck legs, ensuring they are evenly coated.
- Preheat the air fryer to 400°F (200°C) for about 5 minutes.
- Place the duck legs skin-side down in the air fryer basket, ensuring they are not overcrowded.
- Cook for 15 minutes, then flip the duck legs to skin-side up.
- Continue cooking for an additional 15 minutes or until the skin is crispy and the internal temperature reaches 165°F (74°C).
- Let the duck legs rest for 5 minutes before serving.