Welcome to Mateo’s kitchen, where family, good food, and warm memories are always on the menu. Today, I’m excited to share a recipe that’s become a beloved staple in my home: Air Fryer Duck Breast. Whether you’re a seasoned home cook or just starting your culinary journey, this dish is perfect for bringing the family together around the dinner table.
Introduction
Imagine this: It’s a chilly weekend evening, and the aroma of perfectly cooked duck is drifting through your home. The kids are setting the table, and there’s laughter in the air. For me, cooking is all about creating moments like these, and this Air Fryer Duck Breast recipe does just that. It’s a dish that feels fancy enough for a holiday meal but is simple enough for a cozy family dinner. Using the air fryer, we can achieve that perfect crispy skin and tender meat without the fuss, making it an ideal recipe for those busy weeknights or a leisurely weekend dinner. The air fryer not only speeds up the cooking process but also ensures a consistent result every time, making it a fantastic tool for both novice and experienced cooks alike.
Why You’ll Love This Recipe
- Quick and Easy: With just 10 minutes of prep and 15 minutes of cook time, you’ll have a gourmet meal ready in under half an hour. This efficiency is perfect for those hectic days when time is of the essence but quality meals are still desired. The streamlined process allows even the busiest of households to enjoy a home-cooked meal without sacrificing quality or flavor.
- Family-Friendly: This recipe is perfect for making dinner with the kids, encouraging them to help with seasoning or setting the table. Involving children in the cooking process not only teaches them valuable skills but also makes mealtime a shared family experience. It’s a wonderful opportunity to bond and create lasting memories, teaching them the value of teamwork and the joy of preparing a meal together.
- Comfort Food: There’s something inherently cozy about a well-cooked duck breast that makes it a comforting meal for any night. The rich, savory flavors of duck are soul-warming and pair beautifully with a variety of sides. The satisfaction of biting into a perfectly crisp piece of duck is unparalleled, providing a sense of warmth and contentment.
- Minimal Ingredients: It calls for only a handful of everyday ingredients, making it both accessible and budget-friendly. You don’t need a gourmet pantry to make this dish shine, which means it’s perfect for spontaneous cooking. The simplicity of the ingredients allows the natural flavors of the duck to be the star, while also giving you the flexibility to add your own touch.
- Versatile: You can easily adapt this dish with different herbs or pairings to suit your family’s taste. Whether you want to add a spicy kick or a citrusy flair, this recipe is a wonderful canvas for experimentation. Consider adding a glaze made from honey and orange juice for a sweet and tangy variation, or incorporate Asian-inspired spices like five-spice powder for an exotic twist.
The Recipe
Prep time: 10 minutes | Cook time: 15 minutes | Temperature: 400°F | Servings: 2
Ingredients
- 2 duck breasts (about 6-8 ounces each)
- Salt (to taste)
- Black pepper (to taste)
- 1 tablespoon olive oil
- Optional: herbs (e.g., thyme or rosemary) for seasoning
Instructions
- Preheat the air fryer to 400°F (200°C) for about 5 minutes. This ensures even cooking and a crispy skin. Preheating is crucial as it allows the duck to start cooking immediately in a hot environment, which is essential for rendering the fat properly. A well-heated air fryer acts like a mini convection oven, circulating hot air around the duck for an even cook.
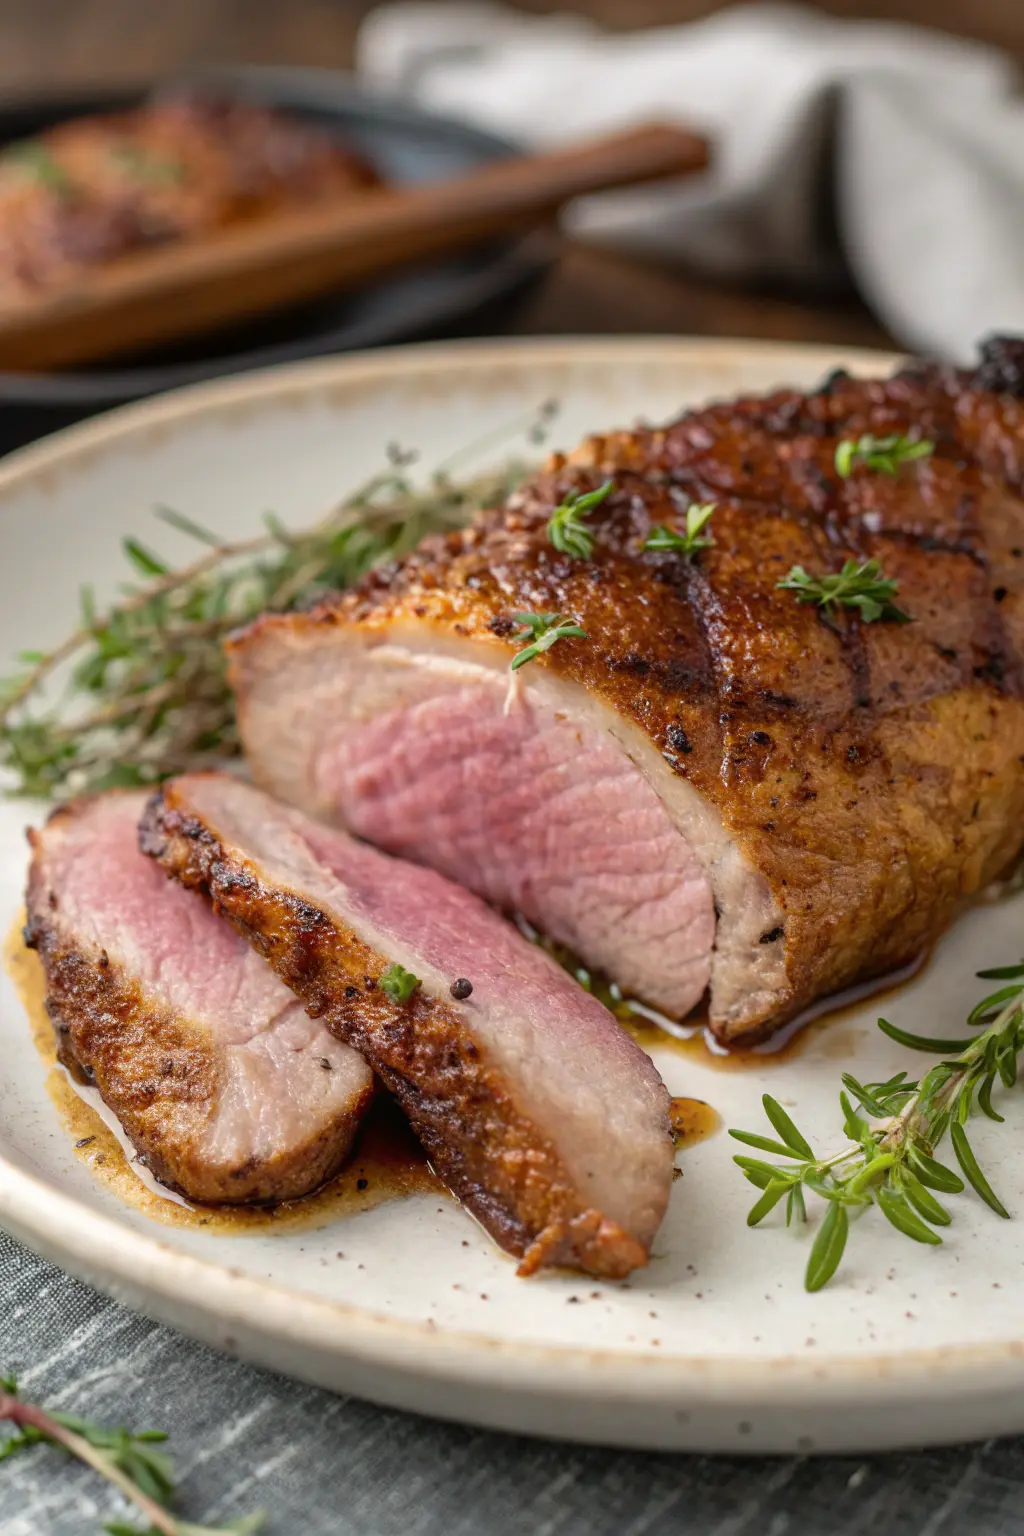
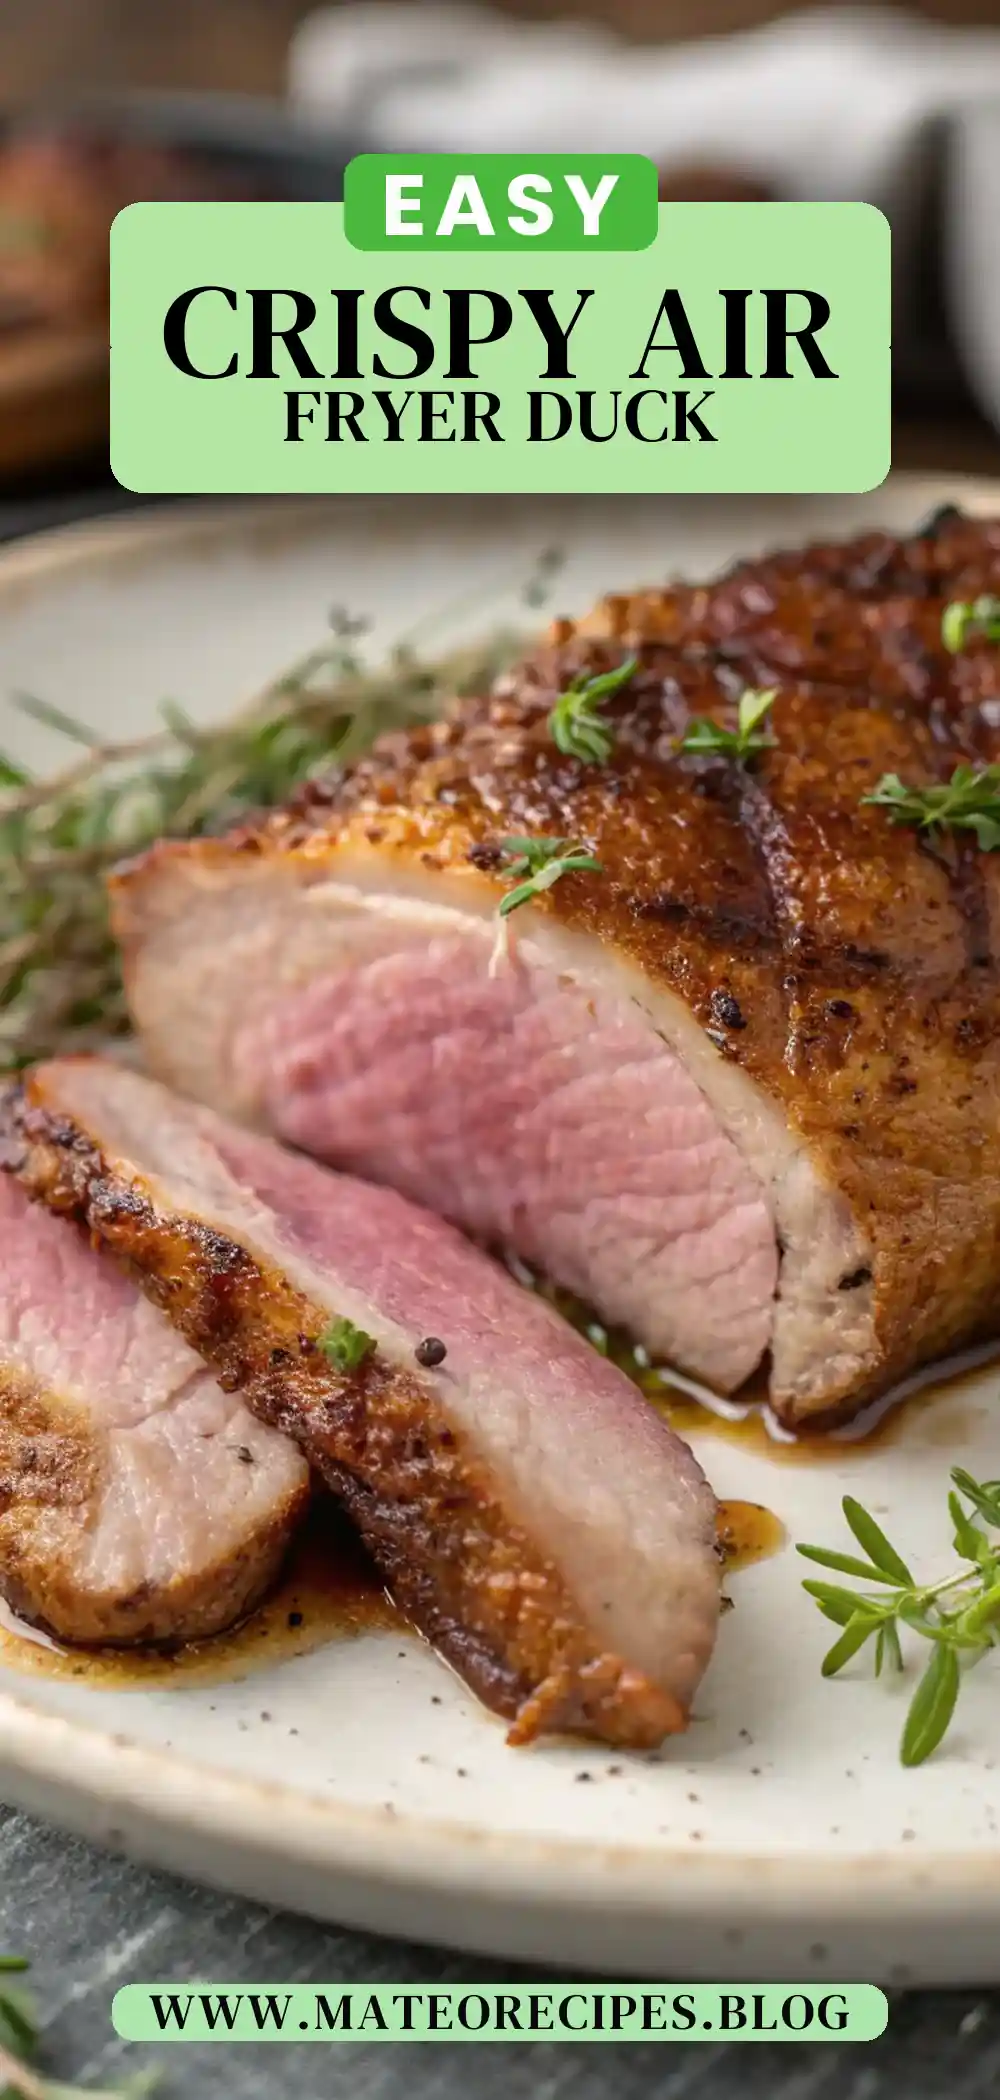
- Score the skin of each duck breast in a crosshatch pattern, being careful not to cut into the meat. This helps the fat render out, leaving you with a beautifully crisp finish. Scoring also allows flavors to penetrate the meat more deeply. The pattern not only looks professional but also enhances the texture of the finished dish.
- Season both sides of the duck breasts generously with salt and black pepper. Drizzle with olive oil and rub it into the skin to enhance the flavors and ensure even crisping. Olive oil adds a layer of moisture that assists in achieving that golden-brown finish. The oil also helps the seasonings adhere better to the meat.
- Place the duck breasts skin-side down in the air fryer basket. Cook for 8 minutes to achieve that initial sizzle and render the fat. The skin-side down method ensures that the skin crisps up beautifully as the fat melts away. This technique is akin to searing in a pan, locking in flavors and juices.
- Flip the duck breasts so they are skin-side up and cook for an additional 7 minutes, or until the internal temperature reaches 135°F (57°C) for medium-rare. Remember, a digital thermometer is your best friend for this step! This precise temperature ensures the duck remains juicy and tender. Adjust cooking time if you prefer your duck more well-done, but be cautious not to overcook, which can lead to dryness.
- Remove the duck breasts from the air fryer and let them rest for 5 minutes before slicing. This allows the juices to redistribute, ensuring every bite is succulent. Resting is a crucial step that cannot be skipped if you want to maintain the meat’s juiciness. Slicing too soon can result in a loss of flavorful juices.
Helpful Tip: For an extra crispy skin, increase the cooking time by 1-2 minutes. Just keep an eye on it to prevent overcooking. Remember, every air fryer is slightly different, so adjust according to your model’s performance. Experimenting with your specific air fryer’s settings can yield even better results as you become more familiar with its nuances.
Kitchen Tools You’ll Need

- Air Fryer: Essential for that crispy skin and tender meat. If you don’t own one yet, consider it an investment in fast, healthy cooking. The compact size and efficiency make it a versatile tool for all kinds of recipes beyond just duck.
- Sharp Knife: For scoring the skin and slicing the duck. A good quality knife will make this task much easier and safer. Investing in a sharp, well-balanced knife enhances precision and safety in the kitchen.
- Digital Meat Thermometer: Ensures perfect doneness every time. This tool takes the guesswork out of cooking, providing peace of mind. It’s an invaluable device for achieving restaurant-quality results at home.
- Cutting Board: A sturdy surface for preparation and resting. Choose a board with a groove to catch any juices when slicing the duck. This feature helps keep your kitchen counter clean and prevents wastage of flavorful juices.
The Benefits of Each Ingredient
- Duck Breasts: Rich in flavor and a great source of protein, duck breasts are the star of this dish. They offer a unique taste that’s both luxurious and comforting. Duck is also packed with iron and essential B vitamins. Its higher fat content compared to chicken or turkey gives it a richer flavor profile.
- Salt and Black Pepper: Simple seasonings that enhance the natural flavors of the duck without overpowering them. These basic spices are pantry staples that are surprisingly versatile. They form the foundation of seasoning, allowing the duck’s natural taste to shine.
- Olive Oil: Helps to crisp the skin and adds a depth of flavor, plus it’s a heart-healthy fat. Olive oil is known for its antioxidant properties and is a staple of the Mediterranean diet. Its subtle fruitiness complements the duck beautifully.
- Herbs (Optional): Thyme and rosemary add a fragrant element to the dish, making it even more aromatic and delicious. Herbs can be fresh or dried, though fresh herbs will impart a more intense flavor. They provide an aromatic complexity that enhances the overall sensory experience.
What to Serve With This Dish
When it comes to serving, this dish pairs beautifully with a variety of sides. Here are a few of my favorites:
- Garlic Mashed Potatoes: Creamy and comforting, they complement the rich flavors of the duck perfectly. Check out my Garlic Mashed Potatoes recipe for a step-by-step guide. The creamy texture and garlicky punch of this side dish make it an ideal partner for duck. The smoothness of the mashed potatoes provides a delightful contrast to the crispy duck skin.
- Roasted Vegetables: A medley of root vegetables like carrots, parsnips, and Brussels sprouts can be roasted alongside the duck for a colorful addition to your plate. The natural sweetness of roasted veggies balances the savory duck. These vegetables can be seasoned with olive oil, salt, and pepper, and roasted until caramelized and tender.
- Simple Green Salad: A light, crisp salad with a tangy vinaigrette balances the richness of the duck. Consider adding ingredients like walnuts or goat cheese for extra flavor and texture. The acidity of the vinaigrette cuts through the richness of the duck, providing a refreshing palate cleanser.
Storage & Leftover Tips
Should you be fortunate enough to have leftovers, here’s how to keep them delicious:
- Storage: Place any leftover duck in an airtight container and refrigerate for up to 3 days. Proper storage ensures that the duck maintains its flavor and moisture. Ensure the container is sealed well to prevent any unwanted flavors from being absorbed in the fridge.
- Reheating: To maintain the crispiness of the skin, reheat the duck in the air fryer at 350°F for about 5 minutes. This method helps preserve the texture that makes this dish so special. Avoid microwaving as it can make the skin soggy and the meat chewy.
- Creative Leftovers: Thinly sliced duck can be a fantastic addition to a salad or a gourmet sandwich the next day. Consider adding it to a wrap with some arugula and a light dressing for a quick lunch. Its rich flavor can also elevate pasta dishes or serve as a topping for a homemade pizza.
And there you have it—a simple, delightful recipe that’s sure to impress your family and make your dinner table the heart of your home. This Air Fryer Duck Breast is not just a meal; it’s an experience that brings warmth, joy, and satisfaction to everyone who shares it. For more comforting recipes, don’t forget to visit Mateo Recipes.
I hope you enjoy making and sharing this Air Fryer Duck Breast as much as I do. Here’s to creating more delicious memories with your loved ones. Happy cooking!

Air Fryer Duck Breast
Ingredients
Equipment
Method
- Preheat the air fryer to 400°F (200°C) for about 5 minutes.
- Score the skin of each duck breast in a crosshatch pattern, being careful not to cut into the meat.
- Season both sides of the duck breasts generously with salt and black pepper. Drizzle with olive oil and rub it into the skin.
- Place the duck breasts skin-side down in the air fryer basket. Cook for 8 minutes.
- After 8 minutes, flip the duck breasts so they are skin-side up and cook for an additional 7 minutes, or until the internal temperature reaches 135°F (57°C) for medium-rare.
- Remove the duck breasts from the air fryer and let them rest for 5 minutes before slicing.