
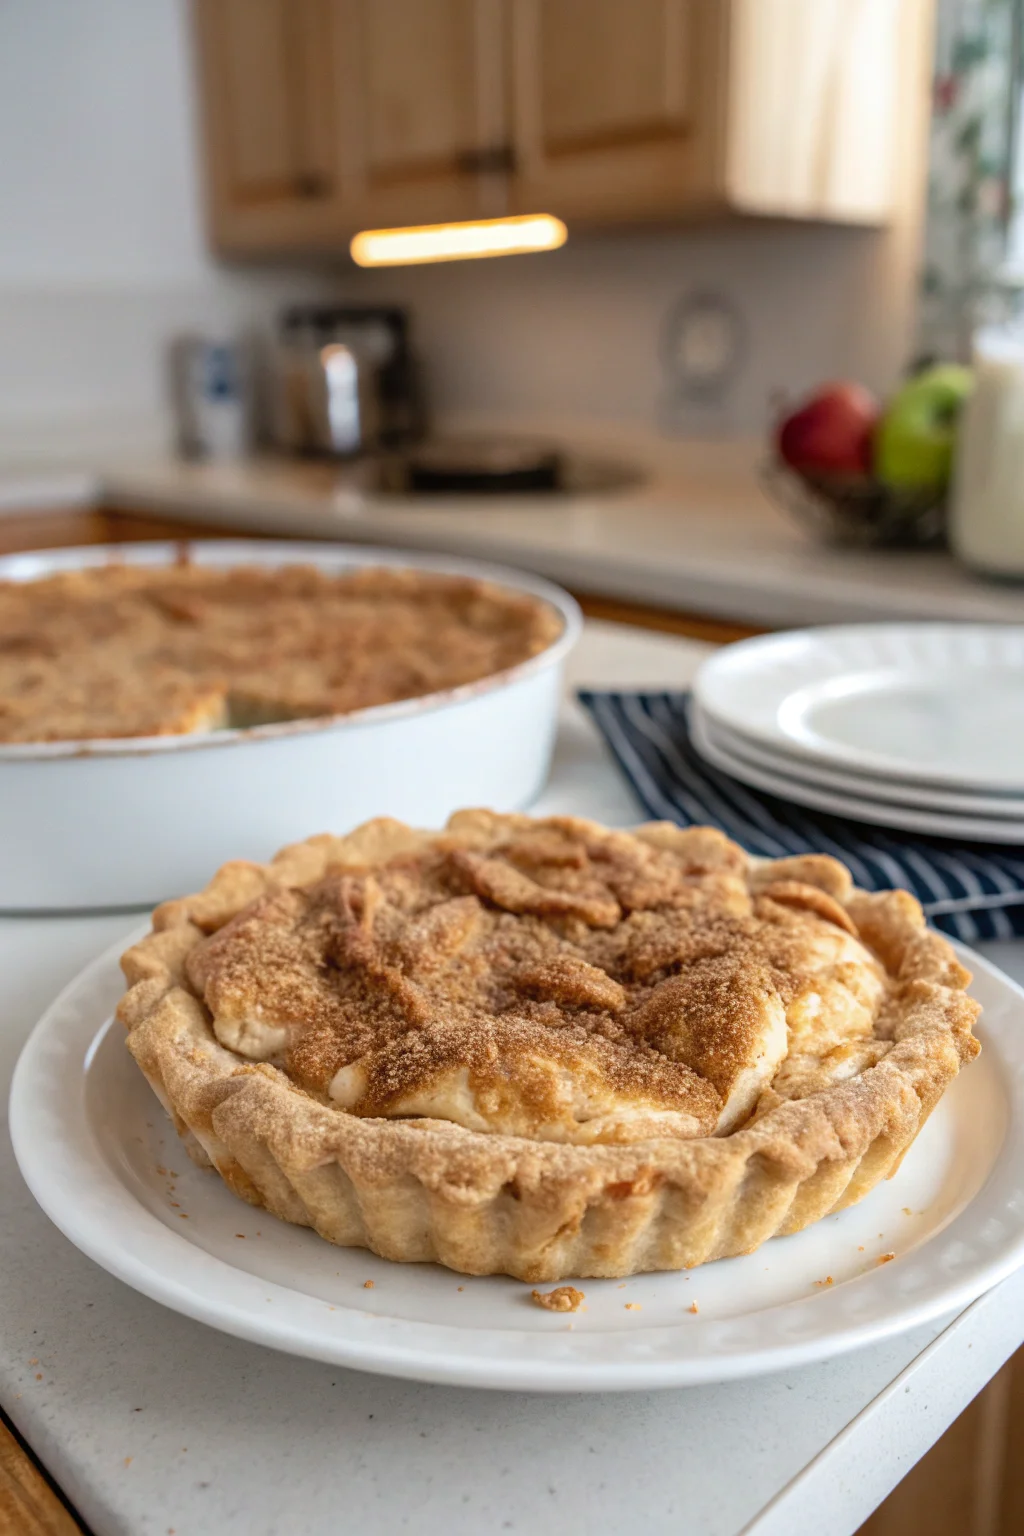
There’s something truly magical about the combination of apples, cinnamon, and cream cheese. Imagine these comforting flavors wrapped in a golden, flaky crust. That’s the essence of my Snickerdoodle Cream Cheese Apple Pie. It’s like inviting the warmth of a cozy autumn afternoon into your home. This recipe has become a beloved tradition in my family, especially during the holidays. I remember the first time I made it, the whole house was filled with the sweet, inviting aroma of baking apples and cinnamon. My kids couldn’t wait to dive in, and now, it’s a staple at our family table. Let’s make your kitchen smell just as wonderful!
Table of Contents
Why You’ll Love This Pie
- Family-Friendly: This pie is a hit with both kids and adults. It’s a comforting dessert that brings everyone to the table. The combination of familiar flavors in an unexpected format makes it a crowd-pleaser. Imagine the delight on your loved ones’ faces as they experience the unexpected creaminess in the first bite.
- Easy to Make: Using pre-made pie crusts saves time without sacrificing that homemade feel. This leaves you more time to spend with family or preparing other dishes for your gathering. You’ll find the process so simple, it might just become your go-to pie recipe.
- Deliciously Unique: The combination of snickerdoodle flavors and creamy cheesecake is unexpected yet delightful. It’s a twist on a classic apple pie that adds a layer of complexity and sophistication. The cream cheese layer provides a surprise element that balances the sweetness with its tanginess.
- Seasonal Delight: Perfect for autumn, but delicious enough to enjoy all year round. The warm spices and sweet apples make it particularly appealing during colder months. It’s the kind of dessert that makes you want to curl up by the fire with a good book and a warm slice of pie.
- Versatile: Great for family dinners, holiday gatherings, or just a cozy weekend treat. It’s a pie that fits any occasion, whether it’s a special event or a simple family meal. Impress your guests with this gourmet twist on a traditional dessert, or enjoy it as a comforting snack on a quiet evening.
The Recipe
Let’s jump into making this delicious pie. Don’t worry, I’ll guide you through each step to ensure it turns out perfectly.
Ingredients:
- 2 pre-made pie crusts (9-inch)
- 4 medium apples, peeled, cored, and sliced (about 4 cups)
- 1 cup cream cheese, softened
- 1/2 cup granulated sugar
- 1/4 cup brown sugar
- 1 teaspoon vanilla extract
- 1 teaspoon ground cinnamon
- 1/4 teaspoon nutmeg
- 1 tablespoon lemon juice
- 1 egg, beaten (for egg wash)
- 1 tablespoon sugar (for sprinkling)
Directions:
Preheat the oven: Start by preheating your oven to 375°F (190°C). This ensures it’s hot and ready when your pie is assembled. Preheating the oven is crucial for achieving that perfectly golden crust. Do not skip this step, as starting with a hot oven helps the crust bake evenly.
Prepare the apples: In a large bowl, toss the sliced apples with lemon juice, cinnamon, nutmeg, granulated sugar, and brown sugar. This mix will give your apples a delightful, spiced sweetness. Make sure each apple slice is evenly coated for consistent flavor throughout the pie. The sugars will start to draw out the juices from the apples, creating a luscious filling.
Cream cheese mixture: In another bowl, beat the cream cheese with vanilla extract until smooth and creamy. This will be the creamy layer that surprises your taste buds. The vanilla enhances the cream cheese’s subtle sweetness and adds depth to the flavor. Ensuring the cream cheese is well softened before mixing prevents lumps and guarantees a smooth texture.
Assemble the pie: Roll out one of the pie crusts into a 9-inch pie dish. Spread the cream cheese mixture evenly over the bottom crust. Then, layer the apple mixture over the cream cheese, spreading it out evenly. Be generous with your apples to ensure each bite is filled with fruit. The combination of layers will bake together, creating a perfect harmony of flavors and textures.
Top it off: Cover with the second pie crust. Trim any excess dough and crimp the edges to seal everything in nicely. Don’t forget to cut a few small slits in the top crust to allow steam to escape. This prevents the pie from becoming soggy as it bakes. The slits also add a decorative touch to your pie’s presentation.
Final touches: Brush the top crust with the beaten egg and sprinkle with the tablespoon of sugar. This step ensures a beautifully golden crust. The sugar also adds a touch of sparkle and sweetness to the crust. For an extra snickerdoodle touch, you might sprinkle a bit of cinnamon sugar instead.
Bake: Place the pie in the oven and bake for 45-50 minutes, or until the crust is golden brown and the filling is bubbling. The aroma will be irresistible! Keep an eye on the pie during the last few minutes to ensure the crust doesn’t over-brown. If needed, you can cover the edges with foil to prevent them from darkening too much.
Cooling: Allow the pie to cool for at least 2 hours before serving. This helps the filling set properly. Patience is key here, as cutting too soon can lead to a runny filling. Letting it rest also enhances the melding of flavors, making each bite more harmonious.
Prep Time: 20 minutes
Cooking Time: 50 minutes
Total Time: 1 hour 10 minutes
Kcal: 350 kcal per serving
Servings: 8 servings
Kitchen Tools You’ll Need
- 9-inch pie dish: Essential for holding your pie. A glass or ceramic dish works best for even baking. The material helps ensure the crust bakes to a perfect, flaky consistency.
- Mixing bowls: For combining your cream cheese and apple mixtures. A variety of sizes is helpful for efficiency. Choose bowls with a non-slip base to keep them steady while mixing.
- Rolling pin: If you need to adjust your pie crusts. A well-floured pin prevents sticking. Using parchment paper beneath the dough can also help transfer the crust to the dish without tearing.
- Pastry brush: To apply the egg wash. This tool helps achieve an even, glossy finish. Silicone brushes are easy to clean and distribute the egg wash smoothly.
- Knife: For slicing apples and cutting crust slits. A sharp knife ensures clean, even slices. A paring knife works well for precision tasks like slitting the pie crust.
The Benefits of Each Ingredient
- Apples: Use tart varieties like Granny Smith for a balanced sweet-tart flavor that complements the cream cheese. Other options include Honeycrisp or Braeburn for a sweeter touch. The firmness of these apples also holds up well during baking, preventing a mushy filling.
- Cream Cheese: Adds a creamy, tangy contrast to the sweet apples, making each bite rich. It also adds a cheesecake-like element to the pie. The creaminess helps to balance the textures and flavors, creating a dessert that’s both rich and refreshing.
- Cinnamon and Nutmeg: These spices transform the pie into a warm, aromatic delight. They are quintessential fall spices that enhance the natural flavor of the apples. Nutmeg adds a subtle, earthy warmth that complements the sweetness of the apples.
- Lemon Juice: Prevents the apples from browning and enhances their natural flavor. It also adds a slight acidity that balances the sweetness. This acidity is crucial for cutting through the creaminess of the cheese layer, making the pie more enjoyable.
- Egg Wash and Sugar: Gives your pie a beautiful golden finish with a slight crunch. The sugar caramelizes during baking for added texture. This caramelization process enhances the pie’s overall sweetness and offers a delightful contrast to the filling.
What to Serve With This Pie
This pie pairs wonderfully with a scoop of vanilla ice cream or a dollop of whipped cream. The cold, creamy texture complements the warm spices and apples. For a cozy family dinner, consider serving it alongside my Cheesy Garlic Mashed Potatoes or the comforting Classic Chicken Pot Pie for a full, satisfying meal. These savory dishes contrast beautifully with the sweetness of the pie. Another delightful pairing could be a warm mug of apple cider or a spiced chai tea, enhancing the spice notes of the pie.
Storage & Leftover Tips
Store any leftovers in the refrigerator, covered with plastic wrap or in an airtight container, for up to 4 days. This keeps the pie fresh and prevents it from drying out. To reheat, simply pop a slice in the oven at 350°F (175°C) for about 10 minutes. This will revive the crust’s flakiness. You can also freeze the pie for