
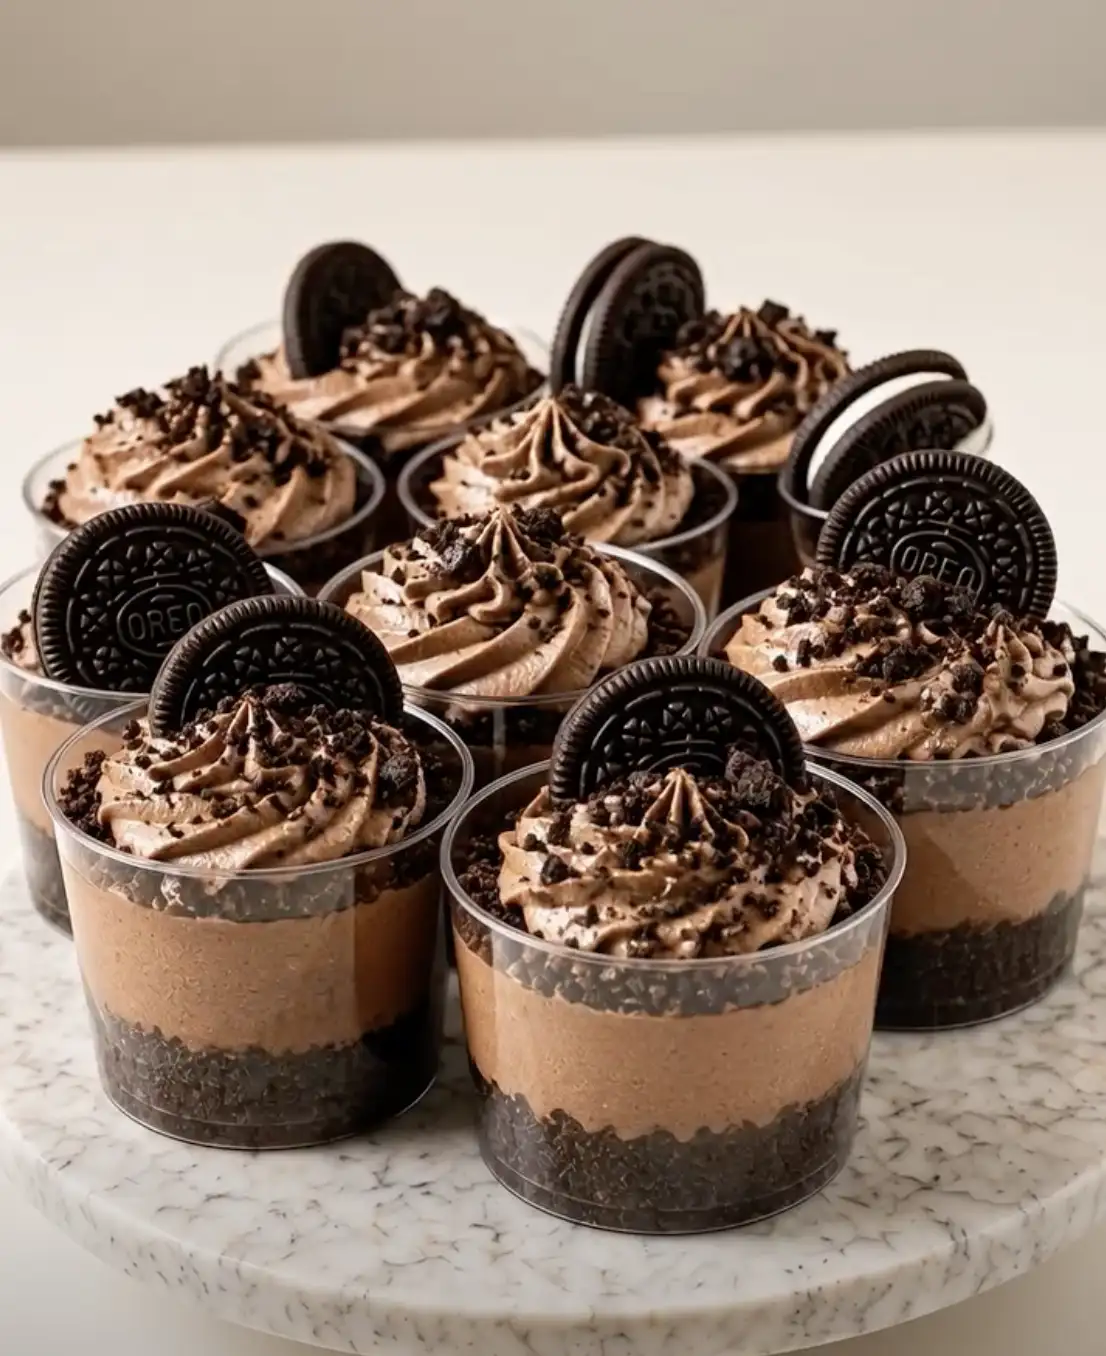
Chocolate Oreo Cheesecake Cups are a delightful treat that combines the classic flavors of Oreos and silky cheesecake into a portable, no-bake dessert. These cups are perfect for family gatherings, parties, or just because you crave something sweet and indulgent. With a creamy chocolate filling nestled between layers of crunchy Oreo crumbs, they are sure to be a hit with both kids and adults alike. The beauty of these cheesecake cups lies in their simplicity and the fact that they require no baking, making them an ideal choice for those hot summer days when turning on the oven feels like a daunting task.
If you’re curious about the origins of your ingredients, you might find it interesting that Oreos have a storied history, dating back over a century with a recipe that has evolved over time. Meanwhile, if you’re looking to understand more about the science behind cheesecakes and why cream cheese is so integral to their texture, this guide on the science of cream cheese might offer some fascinating insights.
Table of Contents
Why You’ll Love This Dish
Making Chocolate Oreo Cheesecake Cups is a breeze, even for those who might be new to the kitchen. You’ll love how these cups require no baking, saving you time and keeping your kitchen cool. Plus, they are ready in just 20 minutes of prep time, followed by a relaxing period in the fridge, allowing you to prepare them ahead of time. They’re also incredibly versatile—you can easily customize them with your favorite toppings or garnishes, such as fresh fruit, chocolate shavings, or even a sprinkle of sea salt for an exciting twist. These cups are not only delicious but also visually appealing, making them a great addition to any dessert table. Their individual serving size makes them convenient for parties, eliminating the need for cutting and serving, and they can be easily transported, ensuring they remain a crowd-pleaser no matter where you take them.
The Recipe
For the Crust and Topping:
| Amount | Ingredient | Notes |
|---|---|---|
| 16 pieces | Oreo cookies, crushed | divided |
For the Filling:
| Amount | Ingredient | Notes |
|---|---|---|
| 16 oz | cream cheese, softened | Ensure cream cheese is at room temperature for easy mixing |
| 1 packet | chocolate pudding mix, dry | 3.9 oz packet |
| 1/2 cup | powdered sugar | Sift to avoid lumps |
| 8 oz | Cool Whip, thawed | Gently fold into the mixture to maintain fluffiness |
- Line a muffin tin with cupcake liners. This step is crucial as it provides structure to the cheesecake cups, ensuring they hold their shape and are easy to remove from the tin.
- Divide half of the crushed Oreos among the liners, creating a crust base. The Oreo crust adds a delightful crunch that complements the smooth filling.
- In a mixing bowl, beat the softened cream cheese until smooth. Beating the cream cheese first ensures that the filling will be creamy and free of lumps.
- Add the dry chocolate pudding mix and powdered sugar to the cream cheese. Mix until well combined. The pudding mix not only enhances the chocolate flavor but also helps thicken the filling.
- Fold in the thawed Cool Whip until the mixture is smooth and fluffy. The Cool Whip adds lightness, making the cheesecake filling airy and easy to spoon into the liners.
- Spoon the cheesecake filling over the Oreo crusts in the liners. Using a spoon or piping bag can help ensure even distribution and a neat appearance.
- Top each cup with the remaining crushed Oreos. This final layer of Oreos not only adds texture but also enhances the presentation with a touch of chocolatey goodness.
- Chill in the refrigerator for at least 2 hours before serving. Chilling allows the flavors to meld and the filling to set, ensuring a perfect bite every time.
These no-bake cheesecake cups are perfect for a make-ahead dessert. Keep them refrigerated until serving time. Consider garnishing with extra Cool Whip or a drizzle of chocolate syrup for an added treat. You might also experiment with different Oreo flavors or add-ins like chocolate chips or nuts for a personalized touch.
Kitchen Tools You’ll Need
| Tool | Why you need it |
|---|---|
| Mixing Bowl | For combining the ingredients into a smooth filling |
| Muffin Tin | To hold the cupcake liners and shape the cups |
Having the right tools on hand can make the preparation process smooth and enjoyable. A good quality mixing bowl ensures ingredients are blended evenly, while a sturdy muffin tin provides the necessary structure for shaping the cheesecake cups. If you have a food processor, it can be helpful for crushing the Oreos quickly, achieving a consistent crumb size that forms a perfect crust.
The Benefits of Each Ingredient
| Ingredient | What it does here |
|---|---|
| Oreo cookies | Provide a crunchy texture and chocolate flavor |
| Cream cheese | Gives the cheesecake its creamy, tangy base |
| Chocolate pudding mix | Adds rich chocolate flavor and helps thicken the filling |
| Powdered sugar | Sweetens the filling without adding graininess |
| Cool Whip | Adds lightness and fluffiness to the cheesecake mixture |
Each ingredient in this recipe plays a crucial role in creating a well-balanced dessert. The Oreo cookies are iconic, offering a familiar chocolatey crunch that pairs perfectly with the creamy filling. Cream cheese forms the base of the cheesecake, lending its signature tanginess and smooth texture. The chocolate pudding mix is a shortcut to achieving that deep chocolate flavor, while also contributing to the structure of the filling. Powdered sugar sweetens the mixture without the risk of granular texture, and Cool Whip introduces a light, airy quality that makes each bite feel indulgent yet not overly heavy.
What to Serve With This Dish
| Idea | Why it pairs well |
|---|---|
| Fresh berries | Add a burst of freshness and color |
| Whipped cream | Complements the creamy texture of the cheesecake |
| Coffee or espresso | Balances the sweetness with a bit of bitterness |
Serving suggestions can elevate your dessert experience. Fresh berries like raspberries, strawberries, or blueberries add a pop of color and a refreshing contrast to the rich cheesecake cups. A dollop of whipped cream can enhance the creamy texture, while a strong cup of coffee or espresso cuts through the sweetness, offering a sophisticated finish to your dessert course. You might also consider serving these cups with a side of vanilla ice cream for an extra indulgent treat.
Storage & Leftover Tips
| Method | How long | Tip |
|---|---|---|
| Refrigerator | 3-4 days | Store in an airtight container to keep fresh |
| Freezer | 1 month | Wrap each cup tightly to prevent freezer burn |
Proper storage is key to maintaining the freshness and flavor of your cheesecake cups. In the refrigerator, they remain delightful for up to four days, making them a convenient make-ahead option for busy weeks. If you’re planning to store them longer, freezing is a great alternative. When freezing, ensure each cup is well-wrapped to prevent freezer burn and preserve the taste and texture. To enjoy, simply thaw in the refrigerator overnight.
To wrap up, these Chocolate Oreo Cheesecake Cups are a delightful and easy dessert that brings joy to any occasion. The combination of creamy cheesecake with the classic crunch of Oreos is irresistible. Whether you’re hosting a party or simply treating yourself, these cheesecake cups are sure to satisfy your sweet tooth. I hope you enjoy making and sharing them with your loved ones as much as I do. For more sweet treats, check out my recipes for Classic Vanilla Pudding and Easy No-Bake Cheesecake. These recipes, like the Chocolate Oreo Cheesecake Cups, are designed to be simple yet delicious, perfect for any level of home cook looking to impress without the stress. Happy baking!
FAQs About Chocolate Oreo Cheesecake Cups
Can I use a different type of cookie for the crust?
Absolutely! While Oreos are classic, you can substitute with any chocolate sandwich cookie or even graham crackers for a different flavor and texture.
How long in advance can I make these cheesecake cups?
These cheesecake cups can be made up to 2 days in advance. Just store them in the refrigerator until you’re ready to serve.
Are there any dietary substitutions for this recipe?
Yes, you can use a dairy-free cream cheese and whipped topping to accommodate dairy allergies. Ensure the pudding mix is also dairy-free if needed.
Chocolate Oreo Cheesecake Cups
Ingredients
Equipment
Method
- Line a muffin tin with cupcake liners.
- Divide half of the crushed Oreos among the liners.
- In a mixing bowl, beat the softened cream cheese until smooth.
- Add the dry chocolate pudding mix and powdered sugar to the cream cheese. Mix until well combined.
- Fold in the thawed Cool Whip until the mixture is smooth and fluffy.
- Spoon the cheesecake filling over the Oreo crusts in the liners.
- Top each cup with the remaining crushed Oreos.
- Chill in the refrigerator for at least 2 hours before serving.