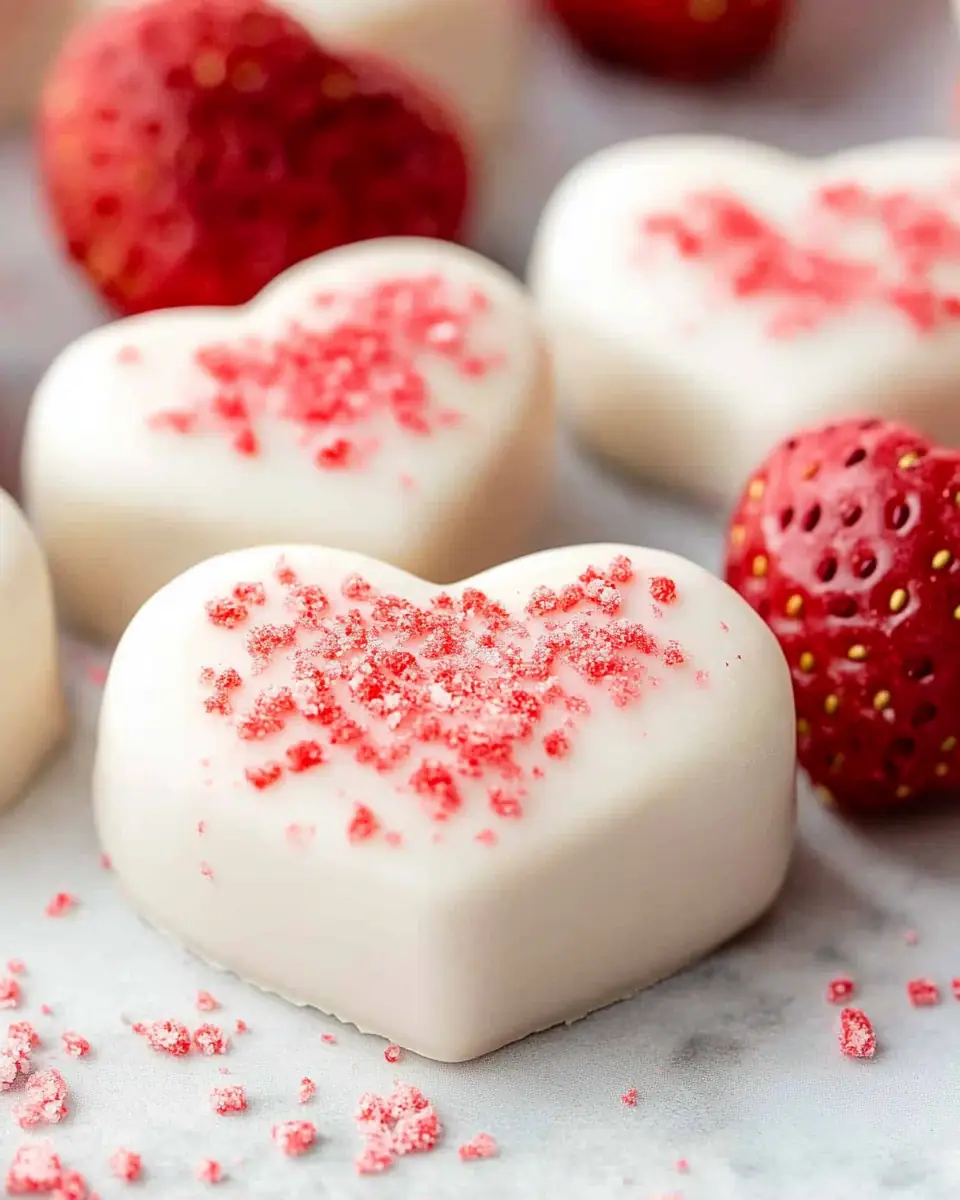
Creating treats that bring smiles to your loved ones’ faces is a rewarding experience, and there’s something particularly special about crafting them together as a family. For me, these Strawberries and Cream Truffle Hearts encapsulate the essence of family gatherings and the joy of sharing something homemade and sweet. The first time I made these delightful truffles was on a rainy weekend with restless kids. We turned the afternoon into a baking adventure, resulting in flour-covered clothes, a delightful kitchen mess, and hearts full of joy. These truffles have since become a family favorite, perfect for Valentine’s Day, birthdays, or any occasion that calls for a little sweetness. They represent a bit of love wrapped in a heart-shaped treat, and I’m thrilled to share this recipe with you.
Why You’ll Love This Recipe
- Family-Friendly Fun: Involving the whole family in the kitchen is a wonderful way to spend time together, and this recipe is perfect for that. Kids can help with mixing and shaping, and the joy they derive from eating their creations is invaluable. The process of making these truffles is as delightful as enjoying the final product.
- Simple Ingredients: No need for fancy ingredients here. You’ll likely find most of these items in your pantry or at your local grocery store. The use of basic ingredients makes this recipe accessible and affordable, ensuring you can whip up a batch anytime the craving strikes.
- Flexible and Forgiving: This recipe is incredibly forgiving, even for novice bakers. The steps are straightforward, and the end result is invariably delicious. Whether you’re a seasoned chef or a beginner, these truffles are practically foolproof.
- Perfect for Gifting: Homemade gifts carry a special charm, and these truffles are no exception. Pack them in a pretty box, perhaps with a ribbon, and you’ll have a thoughtful, homemade present that’s sure to impress.
- A Treat for Any Occasion: While they shine on Valentine’s Day, these truffles can brighten any occasion, from birthdays to anniversaries, or simply turn an ordinary day into something special. They embody the idea that you don’t need a reason to enjoy something sweet.
The Recipe
Ingredients:
- 1 box strawberry cake mix (about 15 ounces)
- Water, eggs, and oil (per box directions)
- 3 tablespoons freeze-dried strawberries (crushed)
- 6 drops red food coloring
- 4 tablespoons unsalted butter (room temperature)
- 4 ounces cream cheese (room temperature)
- 2 cups powdered sugar (adjust for consistency)
- 1 teaspoon vanilla extract
- 6 drops red food coloring
- 16 ounces vanilla candy coating
- Sprinkles (optional)
Step-by-Step Directions:
Preheat the oven to 350°F. Prepare a 9×13-inch baking pan with nonstick spray, ensuring an even coating to prevent sticking.
Prepare the cake batter as per the package directions with a slight tweak: add the strawberry cake mix, water, eggs, vegetable oil, freeze-dried strawberries, and red food coloring. Mix until the batter is fully combined, observing the vibrant pink hue.
Pour the batter into the prepared pan, smoothing the top with a spatula for even baking. Bake according to the box’s instructions, around 25 minutes, or until a toothpick inserted in the center comes out clean or with a few moist pink crumbs.
Set the cake aside and allow it to cool completely. This step is crucial for ensuring the cake crumbles easily and mixes well with the frosting.
To make the frosting, beat the butter and cream cheese together in a mixing bowl until smooth and creamy. The key here is to ensure both ingredients are at room temperature for a seamless blend.
Add the powdered sugar one cup at a time, mixing thoroughly between additions. Add the vanilla extract and food coloring, mixing until the frosting is slightly thick yet spreadable.
Crumble the cooled cake into fine crumbs using your hands or an electric mixer. Reserve a few tablespoons of crumbs for decorating, if desired. The texture should be similar to wet sand.
Add 2 heaping tablespoons of frosting to the cake crumbs and mix on low speed. Add more frosting as needed until the mixture holds together when rolled into a ball.
Line a rimmed baking sheet with parchment paper, allowing extra paper to hang over the edges for easy cleanup.
Press the cake mixture into the pan to about 1/2-inch thickness, pressing firmly and evenly to ensure the truffles hold their shape.
Use a small heart-shaped cookie cutter to cut out heart shapes. Work efficiently to reduce waste, recombining scraps to cut additional shapes if necessary.
Transfer the hearts to a parchment-lined baking sheet and place them in the freezer for at least 30 minutes to firm up.
Melt the vanilla candy coating in a microwave-safe bowl in 20-second intervals, stirring between each, until smooth and completely melted.
Dip each heart into the melted coating using a fork or dipping tool, ensuring even coverage. Tap gently against the bowl to remove excess coating.
Place the dipped truffles back on parchment paper and immediately sprinkle with reserved cake crumbs, freeze-dried strawberry powder, or sprinkles for a decorative touch.
Repeat until all truffles are coated. This step can be a fun assembly line activity if you’re making these with family.
Chill the truffles in the refrigerator or freezer for 15 minutes, or until the coating is set and firm.
Serve at room temperature for the best flavor and texture. The truffles are delightful when the coating is slightly crisp, and the interior is soft and creamy.
Kitchen Tools You’ll Need
- Mixing Bowls: Essential for combining ingredients at various stages.
- Electric Mixer: Useful for ensuring the frosting is smooth and well-blended.
- 9×13-Inch Baking Pan: Provides the perfect size for baking the cake base.
- Parchment Paper: Helps prevent sticking and makes cleanup easier.
- Small Heart-Shaped Cookie Cutter: Creates the adorable shapes that make these truffles special.
- Microwave-Safe Bowl: Necessary for melting the candy coating efficiently.
- Fork or Dipping Tool: Facilitates the dipping process, ensuring each truffle is smoothly coated.
The Benefits of Each Ingredient
- Strawberry Cake Mix: Serves as the foundation of the truffles, offering a light and delightful strawberry flavor that pairs perfectly with the cream cheese frosting. It’s a convenient and flavorful base that simplifies the preparation process.
- Freeze-Dried Strawberries: Enhance the strawberry flavor and add a natural color boost without introducing additional moisture. This ingredient ensures the truffles have a concentrated strawberry taste.
- Cream Cheese: Adds a creamy, tangy element that balances the sweetness of the cake and provides a rich, smooth texture to the truffles.
- Vanilla Candy Coating: Offers a sweet, crunchy shell that beautifully contrasts with the soft interior, adding both texture and visual appeal.
- Powdered Sugar: Sweetens and thickens the frosting, ensuring it binds the cake crumbs effectively to form a cohesive mixture.
What to Serve With This Dish
These Strawberries and Cream Truffle Hearts are delightful on their own, but pairing them with complementary items can elevate your tasting experience:
- Coffee or Tea: The slight bitterness of coffee or the subtle flavors of tea provide a perfect balance to the sweetness of the truffles.
- Fruit Salad: A fresh fruit salad offers a refreshing contrast, with the natural juices balancing the richness of the truffles.
- Vanilla Ice Cream: Serving these truffles with a scoop of vanilla ice cream creates an indulgent dessert that pairs creamy textures with sweet flavors.
For more sweet inspirations, check out my Chocolate Lava Cake and Classic Apple Pie recipes. These desserts, like the truffles, are crafted to bring joy and sweetness to your table.
Storage & Leftover Tips
- Store in an airtight container in the refrigerator for up to a week. To enjoy them at their best, allow them to sit at room temperature for a few minutes before serving.
- Freeze for longer storage. Wrap each truffle individually in plastic wrap and place them in a freezer-safe bag. They’ll keep for up to 3 months. Thaw in the refrigerator overnight for best results.
These Strawberries and Cream Truffle Hearts are more than just a treat; they’re a way to bring joy and love into your home. I hope you enjoy making them as much as my family and I do. Remember, the best part of cooking is sharing it with others, so don’t hesitate to pass this recipe along to someone who might love it too. Happy cooking!
Strawberries and Cream Truffle Hearts
Ingredients
Equipment
Method
- Preheat the oven to 350°F. Spray a 9×13-inch baking pan with nonstick spray.
- Prepare the cake batter according to the package directions. Add the strawberry cake mix, water, eggs, vegetable oil, freeze-dried strawberries, and red food coloring. Mix until fully combined.
- Pour the batter into the prepared pan and bake for the time listed on the box, about 25 minutes. The cake is done when a toothpick inserted in the center comes out clean or with a few moist pink crumbs.
- Set the cake aside and allow it to cool completely.
- To make the frosting, beat the butter and cream cheese together in a mixing bowl until smooth.
- Add the powdered sugar one cup at a time, then mix in the vanilla extract and food coloring. Continue mixing until the frosting is slightly thick but spreadable.
- Crumble the cooled cake into fine crumbs by hand or using an electric mixer. Reserve a few tablespoons of crumbs for decorating, if desired.
- Add 2 heaping tablespoons of frosting to the cake crumbs and mix on low speed. Add more frosting as needed until the mixture holds together when rolled.
- Line a rimmed baking sheet with parchment paper, leaving extra paper over the edges.
- Press the cake mixture into the pan to about 1/2-inch thickness, pressing firmly and evenly.
- Use a small heart-shaped cookie cutter to cut out heart shapes, working efficiently to reduce waste.
- Transfer the hearts to a parchment-lined baking sheet and place them in the freezer for at least 30 minutes.
- Melt the vanilla candy coating in a microwave-safe bowl in 20-second intervals, stirring between each, until smooth.
- Dip each heart into the melted coating using a fork or dipping tool. Tap gently against the bowl to remove excess coating.
- Place the dipped truffles back on parchment paper and immediately sprinkle with reserved cake crumbs, freeze-dried strawberry powder, or sprinkles.
- Repeat until all truffles are coated.
- Chill the truffles in the refrigerator or freezer for 15 minutes, or until the coating is set.
- Serve at room temperature for the best flavor and texture.